You are using an out of date browser. It may not display this or other websites correctly.
You should upgrade or use an alternative browser.
You should upgrade or use an alternative browser.
Commander 26 Re Build
- Thread starter Sttr
- Start date
ship happens
Crew Member
Don't forget a backing plate for that transducer boss
Sttr
Crew Member
Wasn’t thinking to put a plate on, just building it up, levelling it out and adding knitexDon't forget a backing plate for that transducer boss
ship happens
Crew Member
Wasn’t thinking to put a plate on, just building it up, levelling it out and adding knitex
Yuppers, it is required. Survey says
Sttr
Crew Member
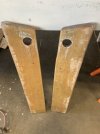
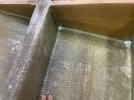
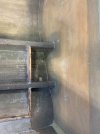
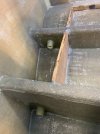
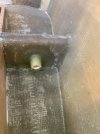
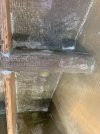
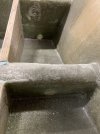
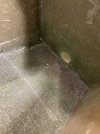
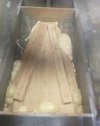
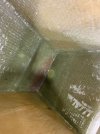
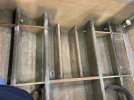
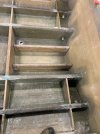
Here’s a few pics of todays work, more of the same tabbing bulkheads. Ron did end up dumping excess resin to level out the drain, looks nice and even, ready for a final drill.
And yes we are ready to install the tank and the floor… almost
I have thought about securing the tank for a week now, foam or tabs with rubber isolators. I personally am not a fan of rubber on a aluminum fuel tank, in my world that’s where all the corrosion starts if exposed to elements, no matter how you lay it out. My Thunderjets tank was secured with tabs and that failed in 6 years.
With the commander, the tank is separated and isolated very well from the elements, unlike a centre console. I’m thinking that’s why the original foam looked like new, there was never any chance for water to get in. I also am very confident the tank will be secured in place very well with foam, with no chance of movement. This tank is also thicker than the original, at almost 3/16. Add everything together, I think the most important thing is to secure the tank so there is no chance of movement, I personally have the most confidence with foam to achieve that goal.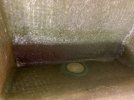


Sea Chaser
Crew Member
Tripe 1200’s !You are hanging 1200hp of the transom?
That looks pretty beefy.
Nice work
bryce
Crew Member
That will be after he has twofootitis once @Rain City pods his and he has to do this to a 30Tripe 1200’s !
Sttr
Crew Member
Twofootitis again!!! How many times can you contract this disease in a lifetime?That will be after he has twofootitis once @Rain City pods his and he has to do this to a 30
Sttr
Crew Member
Ya…. It looks that way huh. Those bulkheads are mainly to separate and isolate the cabin from the bilge area.You are hanging 1200hp of the transom?
That looks pretty beefy.
Nice work
Sttr
Crew Member
One thing I wanted to mention for those who haven’t used polybond or corebond is that it’s extremely light weight, weighs in at a fraction of any resin product. That said I’m in this commander with a drum of resin already and hundreds feet of mat and roving. I do have a scale in my yard, and will weigh the commander next week and throughout the assembly.
SpringFever2359
Well-Known Member
This beast will be a tank! Should ride like a caddy
bryce
Crew Member
I believe it continues until you end up in a 34-36 foot boat then that is to big then you go back to a 28-30 then miss the amenities of the 34-36 then you repeat that sequence until you die I’m at the 30 foot part right now!Twofootitis again!!! How many times can you contract this disease in a lifetime?
Sttr
Crew Member
She sure will float like a caddyThis beast will be a tank! Should ride like a caddy
I have to figure out my pod to make sure she rides at 50mph like a caddy, I’m almost there….
Rain City
Crew Member
Sometimes a max slip size is a good thing. Unfortunately for me when they re-did the pilings at Burrard Civic I somehow ended up with a 42 foot slipI believe it continues until you end up in a 34-36 foot boat then that is to big then you go back to a 28-30 then miss the amenities of the 34-36 then you repeat that sequence until you die I’m at the 30 foot part right now!
Corbin
Well-Known Member
I assume you will be using a mixable two part closed cell foam? I have used it quite a bit over the years and have a suggestion that is going to sound a little crazy. If you mix the foam on a cool day or if the product is cool it expands quite slowly. I have actually seen it break welds on steel fish boats, it just keeps expanding even after it has filled the void.Here’s a few pics of todays work, more of the same tabbing bulkheads. Ron did end up dumping excess resin to level out the drain, looks nice and even, ready for a final drill.
And yes we are ready to install the tank and the floor… almost
I have thought about securing the tank for a week now, foam or tabs with rubber isolators. I personally am not a fan of rubber on a aluminum fuel tank, in my world that’s where all the corrosion starts if exposed to elements, no matter how you lay it out. My Thunderjets tank was secured with tabs and that failed in 6 years.
With the commander, the tank is separated and isolated very well from the elements, unlike a centre console. I’m thinking that’s why the original foam looked like new, there was never any chance for water to get in. I also am very confident the tank will be secured in place very well with foam, with no chance of movement. This tank is also thicker than the original, at almost 3/16. Add everything together, I think the most important thing is to secure the tank so there is no chance of movement, I personally have the most confidence with foam to achieve that goal.View attachment 81197View attachment 81198View attachment 81199View attachment 81200
Last job I did was to fill all around an ice box of a sailboat by drilling 2 inch holes in the cabinet top (cabinet was resurfaced). If it kept expanding it would have damaged the cabinetry. What I did, and do, is to warm the product up, I left it in my hot truck. This greatly reduces the working time as the stuff really goes off, but there is time to mix a batch and pour it in place, It will expand to it's full volume quickly and then start to set, just plan multiple pours. This method also ensures that the product gets to expand to it's full volume, that **** is expensive!!
bryce
Crew Member
42 Lindell sounds perfect then lolSometimes a max slip size is a good thing. Unfortunately for me when they re-did the pilings at Burrard Civic I somehow ended up with a 42 foot slip
Sttr
Crew Member
Yes, two part closed cell.I assume you will be using a mixable two part closed cell foam? I have used it quite a bit over the years and have a suggestion that is going to sound a little crazy. If you mix the foam on a cool day or if the product is cool it expands quite slowly. I have actually seen it break welds on steel fish boats, it just keeps expanding even after it has filled the void.
Last job I did was to fill all around an ice box of a sailboat by drilling 2 inch holes in the cabinet top (cabinet was resurfaced). If it kept expanding it would have damaged the cabinetry. What I did, and do, is to warm the product up, I left it in my hot truck. This greatly reduces the working time as the stuff really goes off, but there is time to mix a batch and pour it in place, It will expand to it's full volume quickly and then start to set, just plan multiple pours. This method also ensures that the product gets to expand to it's full volume, that **** is expensive!!
Will definitely keep that in mind. I’m still going through every pour in my head.
I didn’t see any pour holes from factory or foam on top of the tank. There was a strip lengthwise on each side under the tank and the sides where completely foamed. I do have lots of foam
How ever, the cabin back to the transom will have no foam. That’s how they had it from production
Rain City
Crew Member
Now that's the dream boat42 Lindell sounds perfect then lol
Similar threads
- Replies
- 27
- Views
- 3K
- Replies
- 11
- Views
- 1K
- Replies
- 8
- Views
- 2K
- Replies
- 24
- Views
- 3K

