Commander 26 Re Build

You’ll want to replace all those Marelon thru-hull fittings while you’re at it with some nice stainless ones. I used Gemlux when I did mine and they are outstanding quality. Here is a YouTube link to their “duckbill” inserts, it’s high tech version of the ping-pong ball setup. With the duckbill setup you could theoretically have your your deck as little as an inch or two above the drains. 2 inches or 8 inches doesn’t make a difference, as long as the drain is lower, gravity will do its job, the duckbill will prevent any back flow. Gemlux also makes them with a rubber flap integrated into the opening of the thru-Hull which I have any works well preventing any back flow. The duckbill design is much slicker, regardless.
 
You’ll want to replace all those Marelon thru-hull fittings while you’re at it with some nice stainless ones. I used Gemlux when I did mine and they are outstanding quality. Here is a YouTube link to their “duckbill” inserts, it’s high tech version of the ping-pong ball setup. With the duckbill setup you could theoretically have your your deck as little as an inch or two above the drains. 2 inches or 8 inches doesn’t make a difference, as long as the drain is lower, gravity will do its job, the duckbill will prevent any back flow. Gemlux also makes them with a rubber flap integrated into the opening of the thru-Hull which I have any works well preventing any back flow. The duckbill design is much slicker, regardless.
Link?
 
If your using it for the traditional blister repair yes but doesn’t need to be if your using as a primer for AL. Coating aluminum presents a lot of issues it’s constantly oxidizing if you don’t conversion coat it. Anodizing or conversion coating before powder coating is the best way but adds time and cost. It provides a very good surface for bonding and will continue to protect the material once the inevitable chips happen in the future.

I wouldn’t mount that pod on my boat with plate scabbed together like that it’s likely ok but I wouldn’t be happy either. Should be one solid piece and have stringers inside for strength with 2 big motors going on it full height or at least as high as the lower motor bolt holes. Deck gets welded down last after the inside is done. Open corner joints are the hardest for fitting but give the greatest strength especially when they are welded inside as well full pen by design. A good welder can do a very nice job if they are prepped properly with this fit up. Everyone has their own ways but that’s how I prefer to do it. View attachment 76561
View attachment 76562
hopefully you guys can find a solution. The rest of your build looks great very happy to see the deck dropped always thought it would the way to go. Keep it up
I am thinking long and hard about this pod, that’s a no go on that pod from you, a few more options like this and I won’t mount this pod. But…. I don’t see any structural weak spots even though the bottem is 2 piece. It’s not like its 2 pods welded together, the deck is solid one piece, bar all the way around and the mounting to the hull is 3/8. ( was mistaken earlier thought it was 1/4). IMO there is no way there will be any issues with the welds there, obviously not ideal but again I seen no way no how this is structurally comprised. I do like the size of your stringers but I think mine are plenty.
 
You would have tons of floatation if you raked that pod back a bit. That's a deep hull and wide. Those boats never sat stern heavy with the twin inboards.


Reason we always go up from the drain and not right to the bottom is that the drain is nice to have. Maybe some instances are different depending on use. That boats not exactly a trailer queen so maybe doesnt matter if you delete the drain. If that's the case go right to the bottom, continue the chines with angle and give about a 4inch or 5 inch rake up towards the engines. Just leave enough room for the trim tabs. ‍♂️
 
Last edited:
Doesn't that depend on if you're going full extension (not necessarily full width) or stepped? My limited understanding was that when you want the added hull you follow the hull. When you don't you step it up a few inches as well as raking it up.

As a side, I've discussed the pod design with the guy at Conrad Yachts. He was recommended by another member. He only designs boats. He was going to charge me $2k to fully engineer and design the pod specific to my boat and rigging. Full cut sheets included. Seems like money well spent if I do end up going that route.
You should pay yourself 2k and take a week off,
 
I’m exploring ALL my options that I don’t know much about,
How about a fibreglass pod , Ron?
Built into the transom?
 
You would have tons of floatation if you raked that pod back a bit. That's a deep hull and wide. Those boats never sat stern heavy with the twin inboards.


Reason we always go up from the drain and not right to the bottom is that the drain is nice to have. Maybe some instances are different depending on use. That boats not exactly a trailer queen so maybe doesnt matter if you delete the drain. If that's the case go right to the bottom, continue the chines with angle and give about a 4inch or 5 inch rake up towards the engines. Just leave enough room for the trim tabs. ‍♂️
Sorry I might be mid understanding,
Pods with no rack are built that way primarily to be able to pull the plug and let the pod drain when it’s on a trailer?
 
Don't get off track. It's going to be a sweet boat. **** happens. Do it right. You'll be happy you did
 
Also gentlemen, I’m not worried about making another pod or cutting my boat in half, if I’m not happy with it I’m not installing it, if I m happy with it but get blasted for it not being raked- I’m not installing it. I will sell the pod if I don’t use it, no worries at all
 
Sorry I might be mid understanding,
Pods with no rack are built that way primarily to be able to pull the plug and let the pod drain when it’s on a trailer?

Yeah no misunderstood that. I'll see if I can explain that to you a different way.
 
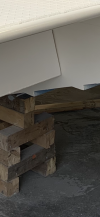
Sorry that’s the best pic of the bottem I can find . You are saying I should start at the bottem of the hull and rake up to my motors a few inches. And the reason you install the pod above the drain on smaller boats is to be able to drain the boat,
 
Back to the original pod, did you guys talk about how to make it work? I thought about it some more today and if I was going to use it, I’d probably cut the top off, grind all the old welds out, cut a matching template for the back, tack it on, add in a few more gussets so it doesn’t move and then start pouring the weld into It. All the gap would end up getting filled with weld. You’d have a flat, and more importantly, a fully enclosed pod if done correctly. Weld as much as you can on the inside, then weld the top back on utilizing plug welds where needed.
 
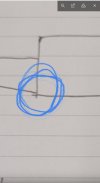
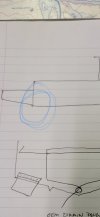
Here is a really quick drawing of how I do it. Simple and will never change the way the hull makes the carving. You don't want the rake too much. Just right. That depends on how much bow lift the hull has when on plane. Every boat is different. You want that pod to sit on the carving. You don't want to add displacement. If you do you absolutely change how the hull rides. Use more power that way. On smaller boats if fine. Big boats, you want efficiency and at a 26ft hull that's already a beast. Hope this makes sense. I gotta get some work done now lol. My 2 cents


Also keep in mind guys when done this way, you have to move the engi e up 1.5 inches per 12 inches setback. Sometimes more depending on bow or stern lift
Then is this meant to be level to bottem of the hull, LoL I don’t have a measuring tape but at this I thought it’s mounted few inches above the hull71B29CE4-A8A7-4176-9387-32AA10DE3F46.jpeg
 

Attachments

  • 06735C06-0B08-4605-B675-436BB8C221BD.jpeg
    06735C06-0B08-4605-B675-436BB8C221BD.jpeg
    182.6 KB · Views: 1
Back
Top