Commander 26 Re Build

I'd give your pod guy the chance to step up. We all screw up... it's all about how we handle it. Clearly missed the mark. Not a good idea forcing the transom, especially with that step preventing it from flexing. You have enough other stuff to keep you occupied, shouldn't hold you up too much. My 2 bits.... Gluck!
For sure, poor guy , I been back to him so many times already to redo work, I’m not sure how hes going to look at me, worst is he cant hide from me Lmao , we all know each other, oh boy. I’m not sure how’s he’s going to make this up to me
 
Interesting the scuppers are at the sides, mine are deck level for self draining and are the ping pong ball style at the transom, lowest point of the deck. I would guess these are 3" tops off the water line and never ever let water into deck. Those side ones look like bilge drains, but that deck used to be a lot higher.
 
I'd give your pod guy the chance to step up. We all screw up... it's all about how we handle it. Clearly missed the mark. Not a good idea forcing the transom, especially with that step preventing it from flexing. You have enough other stuff to keep you occupied, shouldn't hold you up too much. My 2 bits.... Gluck!
But….. this is not a mistake, or screw up. A screw up would me be cutting the deck before Ron came in. This is just not built properly and not checked over ?
I should of checked it when I got the pod but even then that would be way to hard to catch, unless I start putting a straight edge of everything.
 
Interesting the scuppers are at the sides, mine are deck level for self draining and are the ping pong ball style at the transom, lowest point of the deck. I would guess these are 3" tops off the water line and never ever let water into deck. Those side ones look like bilge drains, but that deck used to be a lot higher.
One of them is a bilge drain, the other is a deck drain, there is also one more deck drain on port side
 
Well, before I install the pod I might as well go over my process for measuring the size of the pod, for some reason there is an “industry standard of 30” .
I made a plunge bob and hung it from the rub rail at the centerline of the stern. then I measured the distance from the pod deck mounting location on the transom to the plunge bob - 13”
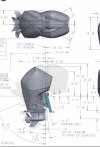
Then I used this diagram to determine the length needed to tilt all the way up. 29” tilted all the way up Straight.
for a grand total of 42, add 2” and we have a total of 44” with tax. I am happy with this measurement but it’s tight IMO. Also my yammies might have slightly different dimensions but should be close. I think I gave myself enough room for error. 7D02C5FE-A06D-459C-A8FC-F9C1E3EF0E2C.jpeg
 
11pm is that the first time you let us know they are Yammies?

I’ll be tripping over my cooler and halibut anchor tomorrow dreaming of the commander beam.

Hope the pod works out. Making me feel bad for not touching my teak for the last couple of years.
Might as well, with all these pod issues I realized this is one of the most important measurements and without knowing what motors are going on it, it would be impossible for anyone here to give me there opinion.
Twin 250 yammies Helmaster EX level 4
 
Looks awesome! I also have an early 80’s commander with 165’s. Just had new fuel tanks installed before I bought it. I’m also a mechanic. I have my own shop etc…
I’m not going to do anything near what you are doing, it I do have to redo the transom at some point and I also need to service the sliding windows as they are pretty much ceased. I have spare engines and drive parts. That’s the good things out these older units is there are tons of good used parts around and easy to work on. Thanks for all the great Info you have been posting.looking forward to seeing more:)
One of my favourite parts of this biuld was playing around with the engines, starting them up in the shop, there’s something about a in-line 6 that just puts a smile on my face. Those windows are a pain when they seize up, be careful full not to crack it! Most likely the “cat whiskers “ weatherstripping needs to be replaced, it’s probably fallen apart and has debris everywhere. U might be able to clean it out? If not windows have to be removed,
Good Luck!
 
Right now the scuppers are mounted 8” above the water line and the deck sits one inch above them. One inch is not enough. IMO 6 inches above the water is plenty, not sure if 4” would cut itView attachment 76374


Are they piped down from the deck?


Ok never mind that question, I see where they are now. They are piped down, which means deck level is a 2 - 3 inches above the thru hulls?

Honestly **** the ball scuppers, those are for a bandaid. I would delete the down pipes and get Ron to glass in side scuppers right out the side. Rectangular ones with a water guard on the front side. Maximum drainage. Extend the hatch drainage troffs right out the side
 
Last edited:
Has anyone seen a pod deform and go crooked from the heat when powder coating ? It that a possibility? Maybe on something thinner? Or some with less structural integrity.
My Pod guy is not very happy and insisted it left straight from his shop and something happened while in my possession.
 
What happens when you put a straight edge across your transom?

Definitely if you tighten that up you will see stress fractures somewhere in the future
 
I agree this needs to be address, pod guy said to silicone it and bolt it up…


Well there you have it. Silicon is not what you want. You want a Poly product like 42 or 5200, I tend to like the sikaflex product better for a lot of things. You have challenges here. Reason is Uv. If you use 4200, 5200, sika 291 they will turn yellowish and be really ugly in about a year. The 295UV work well but it will shrink over about 2 years. 3M has a UV. Think its called 4000 UV?

Anyway your pod guy is out to lunch

As soon as you remove those plugs, bam you crack the powder. Give it one year and the powder will be running away

Better make sure those underwater lights are not brass also. Otherwise your pod will be running away too
 
Well there you have it. Silicon is not what you want. You want a Poly product like 42 or 5200, I tend to like the sikaflex product better for a lot of things. You have challenges here. Reason is Uv. If you use 4200, 5200, sika 291 they will turn yellowish and be really ugly in about a year. The 295UV work well but it will shrink over about 2 years. 3M has a UV. Think its called 4000 UV?

Anyway your pod guy is out to lunch

As soon as you remove those plugs, bam you crack the powder. Give it one year and the powder will be running away
He did say sikaflex, I use the word silicone for everything, just as everything to me is a crossmember! 5200 is what I’m planning but will re think that and take in consideration the UV aspect. Now I am also worried about drilling holes to mount the engines and having issues with the powder coat in that spot.
 
Well there you have it. Silicon is not what you want. You want a Poly product like 42 or 5200, I tend to like the sikaflex product better for a lot of things. You have challenges here. Reason is Uv. If you use 4200, 5200, sika 291 they will turn yellowish and be really ugly in about a year. The 295UV work well but it will shrink over about 2 years. 3M has a UV. Think its called 4000 UV?

Anyway your pod guy is out to lunch

As soon as you remove those plugs, bam you crack the powder. Give it one year and the powder will be running away

Better make sure those underwater lights are not brass also. Otherwise your pod will be running away too
Should I be drilling my pod mounting holes in the pod BEFORE powder coating? Now it’s just making more sense to. Also to inside of the pod was not powder coated, should I address this also when I send my pod out to get redone?
 
Back
Top