Gaddammit need to rethink the chartplotter

  • So with the first plan to use a Lowrance Elite FS9, let it eat 1/2 with a small screen

    Votes: 0 0.0%
  • Go with a Garmin GPSMAP 943XSV, Which will only eat half my dash and buy reading glasses

    Votes: 0 0.0%

  • Total voters
    9
  • Poll closed .
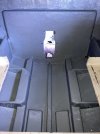
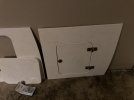
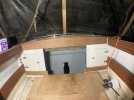
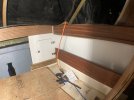
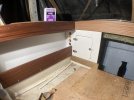
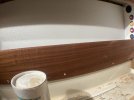
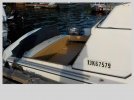
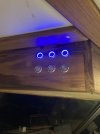
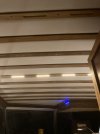
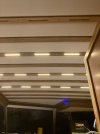
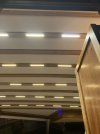
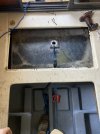
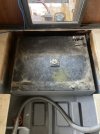
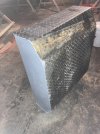
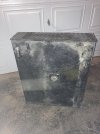
So a few more updates, More sanding and coats of vanish inside but no point showing that again. got the first coat of 2 part Interlux interprotect in the machinery space. There needs to be a few sections that will be modified or filled in (like the old transom assembly bolt holes), but I wanted to get a sealing coat down on the new fiberglass before it got contaminated in any way.


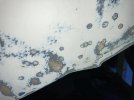
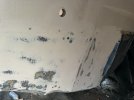
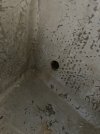
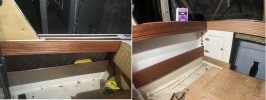
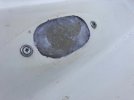
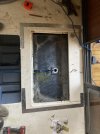
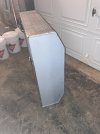
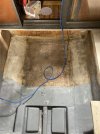
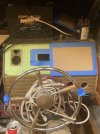
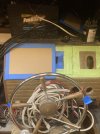
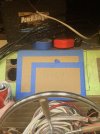
I also got around to scraping and sanding down the transom since I wanted to find every old screw hole and properly patch them. as you can see quite a few transducers have lived on this hull. I will be going to a through hull combined with the 3 in 1 from lowrance, however I will be attaching it to a starboard plate bolted to the new swim platform. I also drilled out every hole I could see that had been previously patched to investigate for any rot or moisture. Unsurprisingly there was some, I went ahead and drilled a few holes in a circular patter extending out from the area to find the limit, thankfully it did not extend too far. Given how thick the fiberglass is on this boat I wont be concerned with structural issues from this as long as it mitigated now. So next step will be temporarily plugging all the holes and sealing up any seams, then I will be putting the vacuum pump on the transom to boil away any moisture within the layers. Then I will be injecting some rotfix resin with a pressure pot while putting it under vacuum.

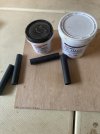
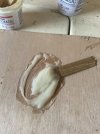
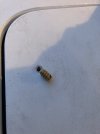
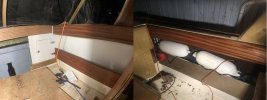
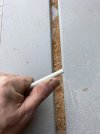
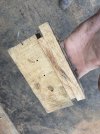
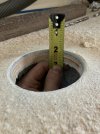
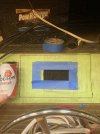
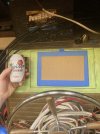
I also finished installing the though tubes and sealed up the limber holes, I happened to have some carbon fiber tube left over from another project that worked perfectly, cut them longer than needed and scuffed them with 40grit, then mixed up some Gelmagic and got them epoxied in place, these are simply to let any water that gets trapped outboard of the stringers to drain down into the bilge

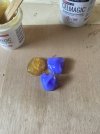
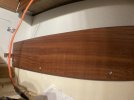
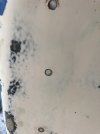
Also with all the new woodwork we decided that the hull will be repainted to a dark blue, I had to do quite a bit of sanding to get everything on the lower part of the transom fair and still have SOOOOO much more hull to sand. Since there was some burn though The transom will be recoated with 2 coats of gelcoat first, then sanded back a bit to get a smooth surface in preparation for the new paint.
 

Attachments

  • IMG-0708.jpg
    IMG-0708.jpg
    219.2 KB · Views: 126
  • IMG-0710.jpg
    IMG-0710.jpg
    232.7 KB · Views: 124
  • IMG-0709.jpg
    IMG-0709.jpg
    249.6 KB · Views: 111
  • IMG-0693.jpg
    IMG-0693.jpg
    232.5 KB · Views: 109
  • IMG-0694.jpg
    IMG-0694.jpg
    145.7 KB · Views: 108
  • IMG-0695.jpg
    IMG-0695.jpg
    263.7 KB · Views: 107
  • IMG-0696.jpg
    IMG-0696.jpg
    276 KB · Views: 126
I spent most of the day running around getting things picked up and ordered, so only checked off couple things,

got two more coats of varnish down and started cutting out and making the transom locker panels for battery access. Starboard of course, with lift off hinges. I like to use threaded inserts for these applications, they are considerably stronger than just using screws, and you don't have the inconvenience of dealing with nuts on the back side. I know you all love it when the back ends of bolts are digging into your shoulder as you're trying to get to a wire at the back of the transom, but I don’t, these give it a nice clean finished surface with no protrusions. And if you ever manage to strip a thread you can back them out and replace them, also no worry about galling like with stainless nuts and bolts.
 

Attachments

  • IMG-0727.jpg
    IMG-0727.jpg
    200.2 KB · Views: 112
  • IMG-0724.jpg
    IMG-0724.jpg
    164.3 KB · Views: 109
got the transom locker bulkheads in, and the port and starboard gear wells, some beautiful ribbon sapele. I can't wait to get some varnish on them. Also go the battery switches test fit. Lastly I fit up the last plank of sapele on the transom, this will be covered with a seat most of the time, the seat will be attached with french cleats, but I wanted to to be able to remove it for fishing, and therefore needed something better looking than fiberglass with some rusty screw holes.
 

Attachments

  • IMG-0744.jpg
    IMG-0744.jpg
    309.9 KB · Views: 131
  • IMG-0743.jpg
    IMG-0743.jpg
    265.6 KB · Views: 133
  • IMG-0742.jpg
    IMG-0742.jpg
    274 KB · Views: 125
  • IMG-0741.jpg
    IMG-0741.jpg
    285.6 KB · Views: 126
  • IMG-0739.jpg
    IMG-0739.jpg
    242 KB · Views: 134
I Went back to look at a couple photos since I couldn't sleep, thought I would throw out a couple before and after composites... well sort of I dont have any close up picture of when the boat had fabric panels on the sides since I removed them almost instantly. But I did have one from an angle that shows them from a distance.

I think its an improvement over the brown astro-turf and plywood.
 

Attachments

  • starboard side.jpg
    starboard side.jpg
    198.6 KB · Views: 147
  • center.jpg
    center.jpg
    185.4 KB · Views: 138
  • Port side.jpg
    Port side.jpg
    185.3 KB · Views: 141
  • IMG-1342.JPG
    IMG-1342.JPG
    49.1 KB · Views: 145
Heh heh a book could be written on "mahogany" and the dozens of tree species that are processed and marketed under that name. I have recurring nightmares about clients asking me to match grain and stain of existing mahogany. Anyway, nice woodwork and keep the pics coming.
 
Heh heh a book could be written on "mahogany" and the dozens of tree species that are processed and marketed under that name. I have recurring nightmares about clients asking me to match grain and stain of existing mahogany. Anyway, nice woodwork and keep the pics coming.
oh god lol yeah now you got me triggered lol I was in windsor plywood and actually had to explain that the "Ribbon Mahogany plywood" was sapele plywood, even showed them on their own website where its labelled as sapele plywood, and then I went to the lumber isle and grabbed a piece of sapele and actual Honduran mahogany (which still isn't the actual REAL mahogany, Cuban mahogany) and put them side by side and asked them which next to the plywood and asked them to tell me which wood was used for the plywood lol. even if you look up "ribbon mahogany" you can find that it is an "African mahogany" aka sapele. its one of the more difficult woods simply because of so many substitutes.
 
lots of little fiddling today.

started off by backing and filling in the old nav light cut-outs, this had those long chromed bronze oval recessed nav lights that ALWAYS leaked, so they are in the bin and new LED nav lights are getting fitted.

Next up was to plug all the old screw holes that I found after removing all the bottom paint. 73!!!!!! friggin holes. I went with the standard method I use to plug screw holes permanently. Since most screws that are used for mounting things are size 8 to 12 there is a nifty way to plug them permanently while maintaining structure. This works well on thick transoms, don’t try it on a transom with a single glass layer or anywhere on the boat with only glass. Start by going by your local plastics/composites supplier and pick up a section of 1/4" fiberglass rod, its cheap a 10 foot long section will run you 15$ (its also available is 3/8, 1/2" and other nominal sizes). then drill out the screw hole to 1/4", be careful not to poke though the other side if you don’t need to, it helps to get a drill bit collar to set a depth, then use a countersink bit to chamfer the edges slightly. rough up a section of the fiberglass rod with 40 or 60 grit sandpaper and cut small sections of the fiberglass rod to a length that is about 1/8" shorter than the depth of the drill hole. Mix up a small amount of epoxy and thicken it with microfibers until its about the consistency somewhere between yogurt and peanut butter. put a bit in each hole, then cover the 1/4 fiberglass rod with the same mix of epoxy and tap it into the hole, and set it just below the surface 1/32" to 1/16" below the surface. This will allow you to come back later with a bit of gelcoat or paste type gelcoat and cover it up. clean off all the excess epoxy and let it set up then touch up with gel coat.

Next I decided I was tired of using the work light so I installed a few of the light switches and then wired them up. set them up in sections so you can set the amount of lighting to mood lighting, bar lighting, and closing time.
 

Attachments

  • IMG-0760.jpg
    IMG-0760.jpg
    140.8 KB · Views: 106
  • IMG-0756.jpg
    IMG-0756.jpg
    177.1 KB · Views: 101
  • IMG-0752.jpg
    IMG-0752.jpg
    108.5 KB · Views: 106
  • IMG-0764.jpg
    IMG-0764.jpg
    117.5 KB · Views: 105
  • IMG-0765.jpg
    IMG-0765.jpg
    116.6 KB · Views: 107
  • IMG-0766.jpg
    IMG-0766.jpg
    153.9 KB · Views: 105
  • IMG-0767.jpg
    IMG-0767.jpg
    148 KB · Views: 109
So I went to remove the old wood bracing that was holding down the tank, seemed like someone with the woodworking skills of a beaver made the bracing, it was ugly, poorly installed and it had to go. Its an aluminum tanks so I was planning on making some "C" channel bracing, when I realized that the tank was much smaller than the space it was in. When I pulled it back it because obvious this was not likely a factory tank as it was made from 1/4" checker plate aluminum, and that started the brain juices flowing.

we had planned on installing a secondary low profile tank in the center of the boat for addition range, as I already was told the tank was about 150L. I took some measurements and found it was actually only 140L, but If I went full width to the stringers I could increase that to 260L!!!!!

So back in the house to the computer, and start making up a model in cad to speculate on the vessel balance. AAAAAND 4 hours later and 4 sheets of paper filled with numbers and scribbles the idea becomes realistic. adding the addition weight in that location should not prove to be a problem and I have the ability to I shift the new water tanks all the way forward in their compartment rather than all the way aft if I need to shift the balance a bit.

so out comes the tape and the saw, and out comes some deck structure to make room for the new tank, and this actually proves to be beneficial as I can now have one large access hatch rather than two. and it will give me better access to the engine for maintenance. I will also be able to make this hatch water tight unlike the old one. I was surprised yet again by the layup of the boat, 1/4" of fiberglass for the deck surface, then plywood, then another 1/8" of fiberglass.

sooooo if anyone wants a 140L fuel tank, make me an offer!! I'll even include the fuel thats in it! (no its not good.... well maybe for bonfires)
 

Attachments

  • IMG-0775.jpg
    IMG-0775.jpg
    211.5 KB · Views: 107
  • IMG-0777.jpg
    IMG-0777.jpg
    221.1 KB · Views: 108
  • IMG-0779.jpg
    IMG-0779.jpg
    222.9 KB · Views: 101
  • IMG-0782.jpg
    IMG-0782.jpg
    224.9 KB · Views: 102
  • IMG-0778.jpg
    IMG-0778.jpg
    166.9 KB · Views: 111
tank is out, surface sanded and preped for paint, and new tank is designed, I have to take some measurements of the motor and drive, but the minumum the tank will be is 260L the maximum will be 310L depending on how long I can make it.
 

Attachments

  • IMG-0787.jpg
    IMG-0787.jpg
    171.3 KB · Views: 77
  • IMG-0786.jpg
    IMG-0786.jpg
    280.1 KB · Views: 77
  • IMG-0785.jpg
    IMG-0785.jpg
    187.8 KB · Views: 74
  • IMG-0784.jpg
    IMG-0784.jpg
    220.9 KB · Views: 76
  • IMG-0783.jpg
    IMG-0783.jpg
    245.2 KB · Views: 78
Are you gong to try and make the doghouse as minimalistic as possible? Is there any floor space to be gained, width or height wise?
 
Are you gong to try and make the doghouse as minimalistic as possible? Is there any floor space to be gained, width or height wise?
It was already relatively small due to how much overhang there is from the transom. I will be making a new fiberglass clamshell style one to replace the old plywood one. the top half will clamshell open and be on pinned hinges for easy removal, the lower half will be locked down with spring catches. And I will be insulating the crap out of it to minimize noise, same with the transom panels.

As is there are 3 seat pads across the back and the backrest pad, but I will only put them out when needed, so the engine cover needs to look good all on its own, same with the transom, which is why I added the sapele plank where the backrest sits.
 
Have you put any thought into podding the boat? With this level of work I think it’s a shame to have a doghouse on the back deck.
 
Have you put any thought into podding the boat? With this level of work I think it’s a shame to have a doghouse on the back deck.
yes that’s the next repower probably 10 years down the road, we managed to source a fuel injected 5.7 and volvo duoprop with all the controls, wiring steering and instrumentation for under 7k, so it fit the bill for what we wanted to accomplish for now, plus we already had a spare 0 hours long block sitting around, so kind of already had a spare if things go wrong at any point.

We had already put a lot of thought into this and it just made the most sense at this time, we even contemplated a diesel. But eventually in 10-20 years down the road when its time for a repower it will be twin 150's or 200's (maybe a single duoprop?) on a proper hull extension, not a pod. Although yes its a lot of work I find it enjoyable and it doesn’t really take me much time since I have all the tooling and space.

And yes I would have much prefered to have a flat deck and no doghouse, but for what we wanted to get accomplished on this refit staying with inboard was the way to go.
 
So I took the day off today, but then got bored, crawled back into the boat and started doing console layout. Annnnnd well I realized I wanted to go with a mostly glass dash, keeping a tach, oil pressure, voltage and and trim display, but I also want these and. everything else on the chart plotter.

and that’s when I had to bring out a beer (maybe 3), sit myself down and stated to cringe. As a captain I have become accustomed to working with full sized 17 to 24” displays, and I can’t bare the thought of split screening a 9” display.
So I cut some templates and sat down to compare them, and took some pictures and came to an unfortunate realization, I will have to end up spending twice as much as I planned because I’m a numpty and can’t stand that small of a screen. I’m pretty sure I have already decided what I will end up doing but heck why not make a poll and have some fun with this.

So there are some pictures, the tape on the dash is making out a lowrance 9” elite display and sharpie marks out the bezel limits. The. I made a cardboard template of a garmin 9” and 12” gpsmap

the lowrance HDS12 is effectively the same height as the garmin but 2” wider

I also played around with shifting the larger screen off center to prevent the wheel from blocking the view.
 

Attachments

  • 9D55A7DE-986A-469A-B73C-F229B338A14B.jpeg
    9D55A7DE-986A-469A-B73C-F229B338A14B.jpeg
    215.8 KB · Views: 113
  • 442DEFCE-B32C-41C2-9174-64294873AAC4.jpeg
    442DEFCE-B32C-41C2-9174-64294873AAC4.jpeg
    231.7 KB · Views: 112
  • B24B97CF-5203-44BE-85A6-EBB92A6256B9.jpeg
    B24B97CF-5203-44BE-85A6-EBB92A6256B9.jpeg
    240.2 KB · Views: 109
  • D6F98AC7-1AF7-4BB0-B1FD-8432F3FF2CC4.jpeg
    D6F98AC7-1AF7-4BB0-B1FD-8432F3FF2CC4.jpeg
    246.3 KB · Views: 103
  • 66C1B0EE-EA74-4DE7-B7B7-64A2C6BDEC8C.jpeg
    66C1B0EE-EA74-4DE7-B7B7-64A2C6BDEC8C.jpeg
    240.5 KB · Views: 102
  • 985A0F16-7121-4F47-9D8A-F048CFB4E407.jpeg
    985A0F16-7121-4F47-9D8A-F048CFB4E407.jpeg
    213.9 KB · Views: 109
My vote-The biggest screen you can get center mounted.Do's your beer have to be mounted on the left or held in hand at all times? :)
 
My vote-The biggest screen you can get center mounted.Do's your beer have to be mounted on the left or held in hand at all times? :)
the beer is an "at anchor accessory", generally mounted to my starboard side ;)
 
Back
Top