ChilliSpoons
Well-Known Member
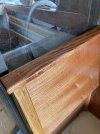
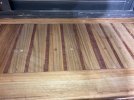
That teak looks wicked
That teak looks wicked
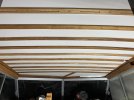
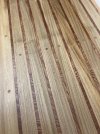
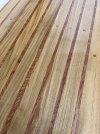
So what's a sheet of ribbon mahogany cost yah?the ribbon pattern is sapele, but in stores you will see it labeled ribbon mahogany, but real mahogany (Honduras) does not have quite that color or gain pattern. I have a gripe over it being called ribbon mahogany, because even if you google it they will label it as African mahogany AKA sapele in this case. But be damned if you can explain that to the 19yo working at Windsor plywood who claimed they had no sapele plywood (which is listed on their website and only took me 2 min to find in store), lol when I pointed it out and said "hey I found it" she insisted it was genuine ribbon mahogany, then despite my through explanation that sapele has been substituted as genuine mahogany for decades because of short suppy she still insisted it was ribbon mahogany, to which I replied "thats interesting you dont list ribbon mahogany on you're website, and this picture of sapele plywood which is on the website seems to match what we are looking at.
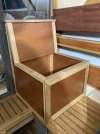
That was about $60, but it was quarter inch and I’ve laminated it to ply that I had in hand which was marine grade half-inch mahogany ply, which turns out was in this case cheaper than buying three-quarter inch ribbon mahogany ply, since I had a suitable backing material on hand. But a 3/4” sheet would cost you about $160So what's a sheet of ribbon mahogany cost yah?


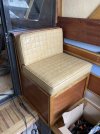
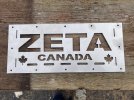
RVYC point right? I think I've seen yout boat before, do you haul out with the club or at lions gate?Hey, I’ve got a 1979 flybridge Zeta 24 I spent 5 years restoring. If you want to come and get a few ideas for yours, let me know. There a great boat. View attachment 62205
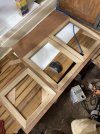
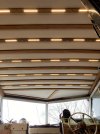
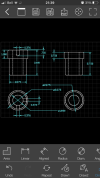
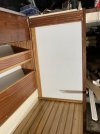
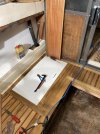
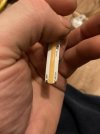
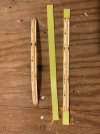
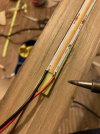
Are you doing a lense behind the wood to hide the LEDs?the evenings work, got the lights up and tested, and also picked up the new airbox parts from the waterjet shop for each side of the engine space.
I've been debating this, haven't decided yetAre you doing a lense behind the wood to hide the LEDs?
Could recess a full strip behind slots without too much trouble. I think it would take it from really cool to awesome.I've been debating this, haven't decided yet
I was debting trying to mix some glow in the dark poweder into some clear ployurathane and pour it into the slots, so you would have a frosted look that would then act as night nights for some time after the LED's have been turned offCould recess a full strip behind slots without too much trouble. I think it would take it from really cool to awesome.
I think onyx might be classier lolI was debting trying to mix some glow in the dark poweder into some clear ployurathane and pour it into the slots, so you would have a frosted look that would then act as night nights for some time after the LED's have been turned off
yeah the problem is I dont want to change the color of the light too much, these are already 3000k, which is pretty warm, too much opacity could dim them more than I want, Trying to keep close to the ideology that luxury is defined by light and space. Space is constricted so I have to work with light.I think onyx might be classier lol
It's pretty impressive as is.yeah the problem is I dont want to change the color of the light too much, these are already 3000k, which is pretty warm, too much opacity could dim them more than I want, Trying to keep close to the ideology that luxury is defined by light and space. Space is constricted so I have to work with light.