YachtMech
Well-Known Member
Well here I am, new to this forum, but not new to working on boats. I figured since I was overhauling our 24' zeta I may as well show the work being done for anyone who would consider doing this themselves.
Quick Summary of what is below, We decided to go to a duoprop and a newer fuel Injected engine. And I figured If I was going to go as far as replacing the engine and drive I may as welll rebuild the whole boat. Start clenching teeth now...
first a bit of history on me, I'm a liscensed captain and a coast guard trained marine engineer and have spent the last 15 years refitting and repairing large private yachts. I have done everything from teak decking installs to overhauls on 9000hp diesels. I figured If I was going to catalogue this project I might as well post it so others can use it to learn. I have been a die hard fisherman my whole life and fish for everything from crappie to chinook, both by rod and speargun.
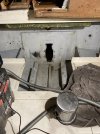
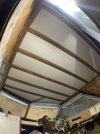
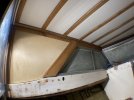
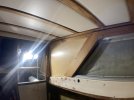
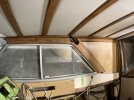
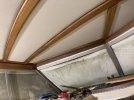
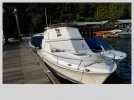
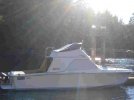
The boat: Its a 1978 Zeta 24 flybridge narrow cabin, we purchased it a few years ago as I have always liked these. After a few discussions with Charlie (Chaz) Hutchinson we decided to purchase the vessel as it was a great candidate to apply my skills to. Right from the start we knew were would be converting it to a volvo duoprop, however we had not decided if we were going to go as far as a diesel or stick to the venerable 5.7 GXi. We decided to go the latter as finding a suitable diesel was not practical, we knew which one we wanted but could not find it (maybe in the future). We knew we wanted to remove all the old laminated plywood interior, and most of the fabric wall panels and replace them with wood, along with quite a lot of extra wood trim. All said and done I did the math on all the additions we were making to make sure the stability, balance and trim would be in the correct ballpark, and all said and done we would be adding about 550 lbs to the boat with all the additional equipment and tankage.
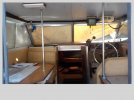
Disclaimer, The goal for this boat is to make it safe, Easy to maintain, and make form follow function. that being said I am NOT a fan of super shiny bright work, I rather the satin or matt look on wood surfaces, as they are easier to maintain as you can just wipe on some fresh oil to keep it looking good, so anyone hoping to see super glossy varnished woodwork will be mostly disappointed.
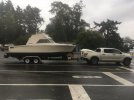
It should be noted this boat is kept on a trailer, If it was left in salt water there are some things I would change/make additions to. Futhermore everything will be done in complicance with ABYC and Transport Cananda standards
The work list is as follows
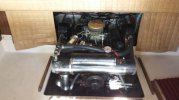
-Replace engine and drive
-Remove ALL the existing wiring and replace as per ABYC codes and fully label the system.
-Add secondary fuel tank
-add primary water racor separator
-add fuel selector valve
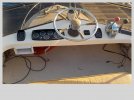
-Install new chartplotter/fishfinder with integrated engine displays
-Add AIS
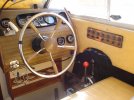
-New Controls
-Inverter
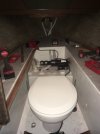
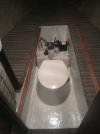
-Head with holding tank
-all new seating and cabinetry
-make port side seat power sliding to change positions.
-new engine cover and TONS of sound proofing to make the boat as comfortably quiet as possible
-New LED lighting throughout, interior, exterior, docking, nav, courtesy
-New Headliner
-New larger water tanks
-new fresh water pump
-Add deck drains to dedicated sump/scupper boxes with redundant bilge pumps
-replace all chromed zinc, chromed bronze or plastic fittings with stainless, everything but the intake strainer is going to stainless (preferably 316 cast polished), railing fittings, rod holders
-new stainless polished intake boxes with integrated drains and water deflection.
-Salt water washdown
-New stainless and teak swim grid, extended and raised slightly
-New tender inflatable RIB with weaver lifter
-Add teak decking to cockpit
-Add teak and sapele flooring to cabin
-Add new Dedicated and separate house and engine batteries
-Add dedicated and separate DC breaker panels for house and engine
-Add AC breaker panel
-Add 30A shore power
-Change all the deck fills to keyless
-Add bowsprit and windlass
-new anchor and ground tackle
-Add overhead Helm electronics box
-All new LED push switches for controls
-Offset upper helm pump (as its centred on the seat, should be to one side to allow two people to sit)
-New Headliner with teak battens
-all new teak or sapele deck cap rails or step plates
-fabricate swing out boarding steps
-add swim grid ladder
-underwater lights
-Add secondary VHF to flybridge
-Add smaller secondary slave nav console to bridge
-make new removeable dining table that will integrate into the seating as a daybed
-Add shelving and storage spaces where possible.
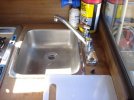
-Stainless galley top
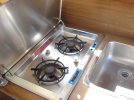
-new propane stove
-new gas sensor (propane and CO) in cabin
-new gas/water/fire detection system in engine space
-new fire suppresion system
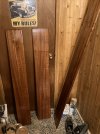
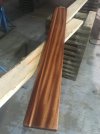
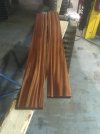
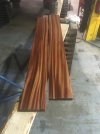
-TEAK, SAPELE, MAHOGANY AND WALNUT TRIM THE **** OUT OF EVERYTHING!!!
work commenced January 28, 2021
Quick Summary of what is below, We decided to go to a duoprop and a newer fuel Injected engine. And I figured If I was going to go as far as replacing the engine and drive I may as welll rebuild the whole boat. Start clenching teeth now...
first a bit of history on me, I'm a liscensed captain and a coast guard trained marine engineer and have spent the last 15 years refitting and repairing large private yachts. I have done everything from teak decking installs to overhauls on 9000hp diesels. I figured If I was going to catalogue this project I might as well post it so others can use it to learn. I have been a die hard fisherman my whole life and fish for everything from crappie to chinook, both by rod and speargun.
The boat: Its a 1978 Zeta 24 flybridge narrow cabin, we purchased it a few years ago as I have always liked these. After a few discussions with Charlie (Chaz) Hutchinson we decided to purchase the vessel as it was a great candidate to apply my skills to. Right from the start we knew were would be converting it to a volvo duoprop, however we had not decided if we were going to go as far as a diesel or stick to the venerable 5.7 GXi. We decided to go the latter as finding a suitable diesel was not practical, we knew which one we wanted but could not find it (maybe in the future). We knew we wanted to remove all the old laminated plywood interior, and most of the fabric wall panels and replace them with wood, along with quite a lot of extra wood trim. All said and done I did the math on all the additions we were making to make sure the stability, balance and trim would be in the correct ballpark, and all said and done we would be adding about 550 lbs to the boat with all the additional equipment and tankage.
Disclaimer, The goal for this boat is to make it safe, Easy to maintain, and make form follow function. that being said I am NOT a fan of super shiny bright work, I rather the satin or matt look on wood surfaces, as they are easier to maintain as you can just wipe on some fresh oil to keep it looking good, so anyone hoping to see super glossy varnished woodwork will be mostly disappointed.
It should be noted this boat is kept on a trailer, If it was left in salt water there are some things I would change/make additions to. Futhermore everything will be done in complicance with ABYC and Transport Cananda standards
The work list is as follows
-Replace engine and drive
-Remove ALL the existing wiring and replace as per ABYC codes and fully label the system.
-Add secondary fuel tank
-add primary water racor separator
-add fuel selector valve
-Install new chartplotter/fishfinder with integrated engine displays
-Add AIS
-New Controls
-Inverter
-Head with holding tank
-all new seating and cabinetry
-make port side seat power sliding to change positions.
-new engine cover and TONS of sound proofing to make the boat as comfortably quiet as possible
-New LED lighting throughout, interior, exterior, docking, nav, courtesy
-New Headliner
-New larger water tanks
-new fresh water pump
-Add deck drains to dedicated sump/scupper boxes with redundant bilge pumps
-replace all chromed zinc, chromed bronze or plastic fittings with stainless, everything but the intake strainer is going to stainless (preferably 316 cast polished), railing fittings, rod holders
-new stainless polished intake boxes with integrated drains and water deflection.
-Salt water washdown
-New stainless and teak swim grid, extended and raised slightly
-New tender inflatable RIB with weaver lifter
-Add teak decking to cockpit
-Add teak and sapele flooring to cabin
-Add new Dedicated and separate house and engine batteries
-Add dedicated and separate DC breaker panels for house and engine
-Add AC breaker panel
-Add 30A shore power
-Change all the deck fills to keyless
-Add bowsprit and windlass
-new anchor and ground tackle
-Add overhead Helm electronics box
-All new LED push switches for controls
-Offset upper helm pump (as its centred on the seat, should be to one side to allow two people to sit)
-New Headliner with teak battens
-all new teak or sapele deck cap rails or step plates
-fabricate swing out boarding steps
-add swim grid ladder
-underwater lights
-Add secondary VHF to flybridge
-Add smaller secondary slave nav console to bridge
-make new removeable dining table that will integrate into the seating as a daybed
-Add shelving and storage spaces where possible.
-Stainless galley top
-new propane stove
-new gas sensor (propane and CO) in cabin
-new gas/water/fire detection system in engine space
-new fire suppresion system
-TEAK, SAPELE, MAHOGANY AND WALNUT TRIM THE **** OUT OF EVERYTHING!!!
work commenced January 28, 2021
Last edited:
![DSCN0081[1].JPG](/data/attachments/61/61947-f44e77f145bafe4c49aed937740bd176.jpg)