What Did You Do To Your Boat This Week?

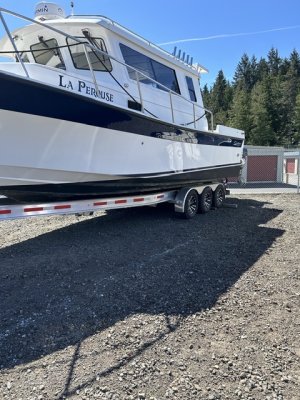
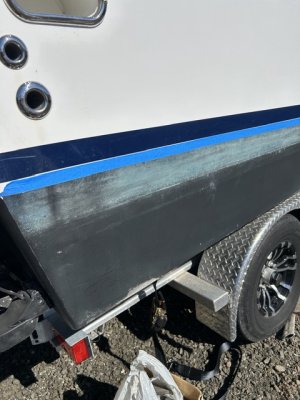
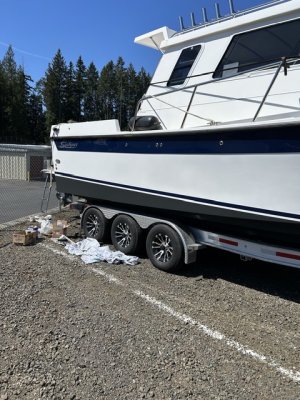
Bottom paint! I kind of miss the days when I could keep my boat on a trailer and just launch for the day or for the trip then pull out. With a bigger boat it stays wet slipped and looks like 10 miles of bad road once the marine growth starts doing its thing

So much for the “non-toxic” non-cuprous stuff

IMG_2137.jpeg


But it sure looked sexy once I removed the tape….


IMG_2138.jpeg


IMG_2139.jpeg
 
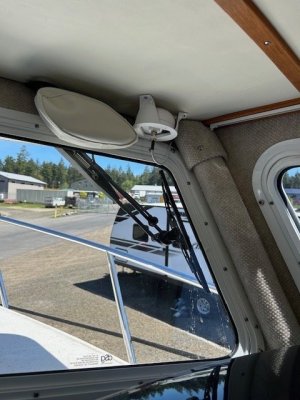
Finally got the AIS GPS puck properly mounted on the interior of the wheelhouse roof. There was just no way I was going to mount it on the exterior and deal with drilling holes, especially with all the solar panels up there now

It’s been sitting on the console and worked just fine but somehow that didn’t seem like a “professional” placement. I was dreading the wire fishing exercise as I knew the rigging tube was jam-packed with other cables but I got the job done

Of course there’s no guarantee I didn’t pierce the casing of other wires behind the panel when I drilled the holes for the attachment screws to hold the puck in place…I guess I’ll find out if and when my radar doesn’t work this summer….ha ha

I flicked on the AIS for just a few minutes and boom, there was La Perouse on the MarineTraffic website so shooting through the wheelhouse roof seems to work just fine

IMG_5870.jpeg
 
Last edited:
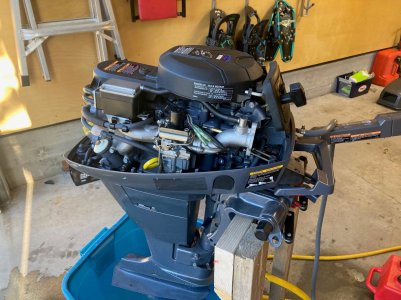
Picked up an old Yamaha 9.9 four stroke that wasn't running for $50 and a pack of beer. Built a stand in the garage, and started to tear into it to see what was up.

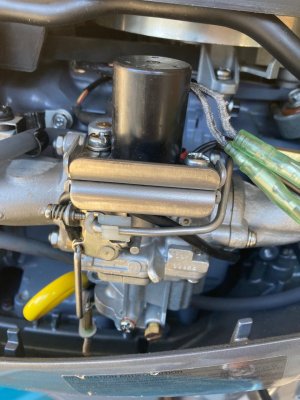
Step 1: Pull the carb, disassembled - cleanout any varnish, blew out the jets. Re-assembled. (pretty easy on this model)

Still won't start, but will fire for a few seconds if I manually toggle the throttle linkage on the side of the carb before pulling the starter cable (however manually throttling up when it is running does nothing). Starts, runs 5 seconds, dies - but not rough. My guess is choke related.

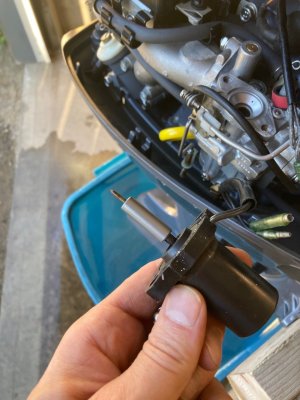
Step 2: This model doesn't have a manual choke - it has a solenoid valve on top of the carb. Pulled the solenoid, put a piece of tape over the opening to simulate full choke. Fingers crossed - starts first pull - idles nicely. After about 30 seconds, I peel back the corner of the tape to simulate pushing the choke in. Still idles fine. Solenoid seems to be the source of the problem. Looks like water pump is dead as well.

Now just need to order parts, and see if anything else comes up.
 

Attachments

  • 1.jpg
    1.jpg
    375.8 KB · Views: 46
  • 2.jpg
    2.jpg
    196.4 KB · Views: 46
  • 3.jpg
    3.jpg
    165.9 KB · Views: 46
I had a similar 9.9 yamaha without manual choke. To choke it you moved the throttle back and forth fully and quickly around 10 times before trying to start it.
 
I had a similar 9.9 yamaha without manual choke. To choke it you moved the throttle back and forth fully and quickly around 10 times before trying to start it.
lol, that is manually flooding it. same idea.
 
Picked up an old Yamaha 9.9 four stroke that wasn't running for $50 and a pack of beer. Built a stand in the garage, and started to tear into it to see what was up.

Step 1: Pull the carb, disassembled - cleanout any varnish, blew out the jets. Re-assembled. (pretty easy on this model)

Still won't start, but will fire for a few seconds if I manually toggle the throttle linkage on the side of the carb before pulling the starter cable (however manually throttling up when it is running does nothing). Starts, runs 5 seconds, dies - but not rough. My guess is choke related.

Step 2: This model doesn't have a manual choke - it has a solenoid valve on top of the carb. Pulled the solenoid, put a piece of tape over the opening to simulate full choke. Fingers crossed - starts first pull - idles nicely. After about 30 seconds, I peel back the corner of the tape to simulate pushing the choke in. Still idles fine. Solenoid seems to be the source of the problem. Looks like water pump is dead as well.

Now just need to order parts, and see if anything else comes up.
Looks super clean for $50. Nice find if the fix is that simple.
 
Looks super clean for $50. Nice find if the fix is that simple.
We'll see. Looks like around $130 for the new solenoid valve plus probably another $65 for the water pump kit. At that point I get to find out if its actually any good, but if I can get a running early 2000s 4-stroke for around $250 (all-in), with some sweat equity - that's a pretty good deal in my books.

I noted that when I pulled the solenoid valve, there was no o-ring (one is shown in the parts diagram on Crowley Marine), which is suspicious - So I think I'm going to test the valve out a bit by running 12v through it and see what happens. Don't want to spend money on the solenoid if its just a missing o-ring. The danger is always that someone messed with it, so putting it back together the way you found it can be its own set of problems.
 
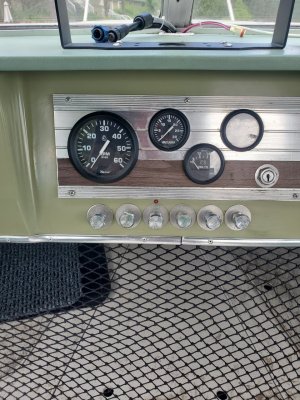
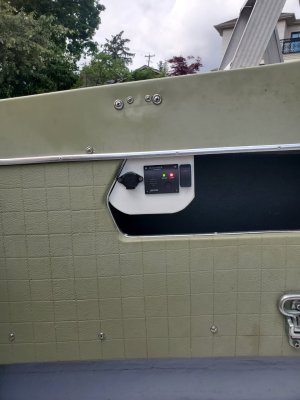
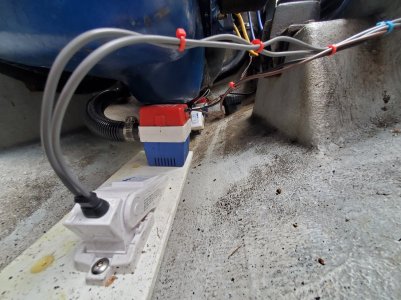
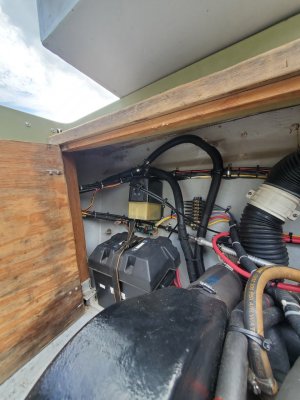
What started out as replacing a float switch ( which wasn't needed as it turned out...I'm an idiot..don't ask) turned into adding a second float switch with a back up bilge pump with its own switch wired to its own battery as well as a high water bilge alarm.. and also adding an indicator light at the dash for the primary pump. Also replacing the primary pump with a new pump. Probably a little overkill but what the hey.

I also went down a rabbit hole on bilge pump switches and wiring. That's a whole other thread.
 

Attachments

  • 20240513_152529.jpg
    20240513_152529.jpg
    196.6 KB · Views: 60
  • 20240513_152403.jpg
    20240513_152403.jpg
    416 KB · Views: 60
  • 20240513_152245.jpg
    20240513_152245.jpg
    210.4 KB · Views: 61
  • 20240513_152229.jpg
    20240513_152229.jpg
    310.8 KB · Views: 63
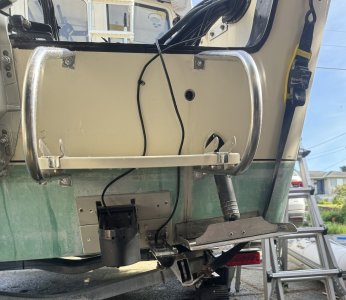
Mounted the swim grid, reattached the transducers (figure I'll have the move the Active Imagine 3 in 1 up a little bit). Going to have to buy a new ladder as had to angle the port handle up to avoid the main hitting it. Got it working with a couple of quick release pins. Anyone want a nice 3 step ladder and bracket? trade for whatever or a couple flats of sparkling water!

Need a stack of 1/4 inch stainless washers to get her level, the old iPhone on a slanted driveway is not precise.

Both motors fired up like champs and got the family to Sidney spit, low tide days are awesome on the north west side.

Who won the Derby?
 

Attachments

  • IMG_1981.jpeg
    IMG_1981.jpeg
    290.2 KB · Views: 58
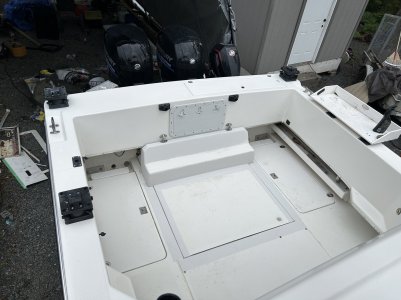
Finally got around to flattening my floor. So much room now. Was able to save the anti slip from my engine hatch. Clean up and polish should match ok.
Lowered mains one hole each
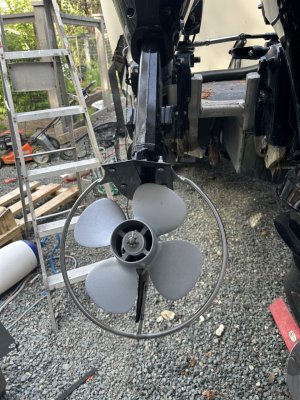
Put on a prop guard, halo style all ss.
(Whiskey creek welding has them, old e and d place)
 

Attachments

  • IMG_9078.jpeg
    IMG_9078.jpeg
    318.3 KB · Views: 65
  • IMG_9087.jpeg
    IMG_9087.jpeg
    320.1 KB · Views: 13
  • IMG_9088.jpeg
    IMG_9088.jpeg
    303.4 KB · Views: 13
Last edited:
I re-spliced my chain to rode connection

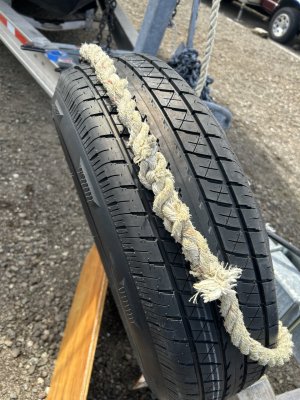
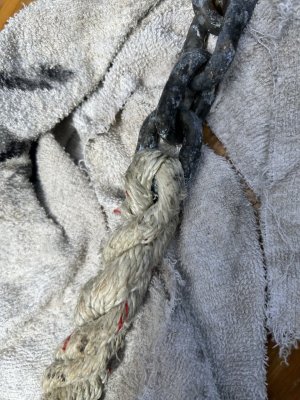
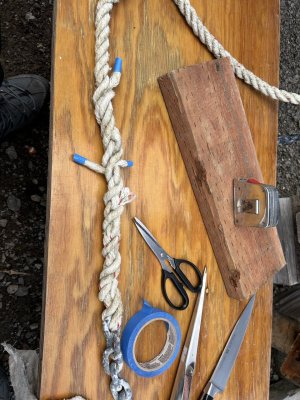
I use a 2 strand splice to side-step the skipping and jamming I experienced with the more common 3-strand splice in my windless gypsy. For anyone interested in this splice, this is what that splice looked like after a full summer of boat camping and going through several gales during my trip north last summer;

You can see that the two strand diameter is not much more then the chain which explains the smooth transition through the gypsy

IMG_2169.jpeg


IMG_2175.jpeg
 
Last edited:
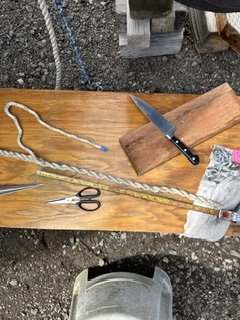
Quick pictorial of the process for anyone interested:

1)) Measure out approx. 24” of rode then un-flay one of the strands up the 24” length per following picture

IMG_2176.jpeg


2)) Feed the remaining two strands through the chain link and snug the chain link up to the top of the tape measure portion


3)) Take the single strand seen in the above picture and un-flay it an additional 24” UP the rode, being careful to keep the natural twist in it

4)) Take one of the strands you pushed through the chain link and take that strand and follow it up the rode in the same groove that you just laid bare when un-flaying that single strand mentioned in step 3))…fasten with tape to hold it in place

5)) Take the second strand that was fed through the chain link and do a normal splice up the rode. After approx. 12”……cut the strand to reduce diameter by 50% then continue splicing to get a tapered splice—— 3 or 4 tucks should be sufficient

6)) Tie an overhand knot in the remaining two strands then splice one of those two strands up the rode and the other strand down the rode for 3 or 4 tucks

Finished splice should look (more or less) like this:

IMG_2188.jpeg


Please note— this rode was wet when I did this splice and tended to unravel during the splicing process which explains why it looks a bit messy.

I will dry out the rode in the sun, then re-splice and allow for a longer splice from the chain link to where the strands show in the above picture just to be safe. I’ll probably go further up the rode to find some rode to splice that shows a bit less abrasion….yes, yes, I know, I know….a good argument for an all-chain rode but…… I don’t want all that weight in my bow

Also, it doesn’t hurt to whip those strands sticking out of the splice with waxed thread or melt them with a hot knife…..I “sewed” the strands into the splice with an awl for my trip last summer…..zero unraveling so heavy-duty waxed thread seems to hold the splice together quite well

On this splice I’m going to use some Dyneema thread I purchased
 
Last edited:
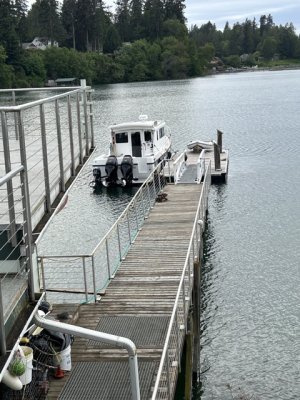
So to my complete surprise, this showed up at my dock tonight. Feels good to know the summer season is starting!

IMG_2195.jpeg


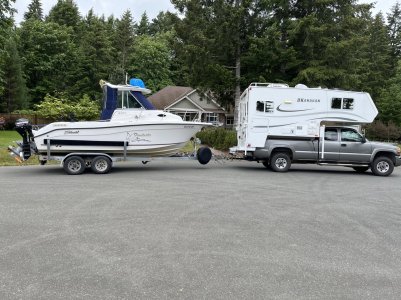
I almost pulled the plug on launching tonight—- I got half-way to the storage facility where my boat is parked and realized I’d forgotten my tow ball. Shiat…..I do a Youey and on the way back to my house I see a serious motorcycle accident—the bike was upside down on the driver…there were people starting to gather so I kept on driving….I could see traffic backing up in the lane I’d have to drive once I got the tow ball……don’t launch…don’t launch said the guy in the jester suit on my shoulder….but we have a big holiday coming up and I knew I had to bust a move so I’d have the ramp to myself with an incoming tide…I stuck a sock in the jester’s mouth and kept driving

I get the boat launched but funny thing….I can’t shake it off the trailer…yup…retaining straps still attached. Pull it back out, get the straps off, tie the bow line to the dock rail, shake the boat off, pull forward but the boat is following the trailer….yup, bow line hooked the bunk and the trailer tire ran over it…

Throughout all this I was thanking the Lord I was completely 100% alone for this self-inflicted gong show….but I got her done and the boat ran like a sewing machine back to my dock

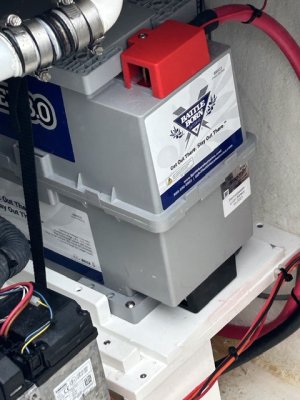
Pulling the four 6 volt house batteries (258lbs!!!) and replacing with an 80 lb LiFePo so far seems to be a good move. I ran at 4,100 RPM this evening and fuel burn was 1.40-ish….I recall back in the days with all that weight in the stern I don’t think I would have done better then 1.25–1.30 at that RPM

Anyway, sure feels good to get her wet again!
 
So to my complete surprise, this showed up at my dock tonight. Feels good to know the summer season is starting!

View attachment 106424


I almost pulled the plug on launching tonight—- I got half-way to the storage facility where my boat is parked and realized I’d forgotten my tow ball. Shiat…..I do a Youey and on the way back to my house I see a serious motorcycle accident—the bike was upside down on the driver…there were people starting to gather so I kept on driving….I could see traffic backing up in the lane I’d have to drive once I got the tow ball……don’t launch…don’t launch said the guy in the jester suit on my shoulder….but we have a big holiday coming up and I knew I had to bust a move so I’d have the ramp to myself with an incoming tide…I stuck a sock in the jester’s mouth and kept driving

I get the boat launched but funny thing….I can’t shake it off the trailer…yup…retaining straps still attached. Pull it back out, get the straps off, tie the bow line to the dock rail, shake the boat off, pull forward but the boat is following the trailer….yup, bow line hooked the bunk and the trailer tire ran over it…

Throughout all this I was thanking the Lord I was completely 100% alone for this self-inflicted gong show….but I got her done and the boat ran like a sewing machine back to my dock

Pulling the four 6 volt house batteries (258lbs!!!) and replacing with an 80 lb LiFePo so far seems to be a good move. I ran at 4,100 RPM this evening and fuel burn was 1.40-ish….I recall back in the days with all that weight in the stern I don’t think I would have done better then 1.25–1.30 at that RPM

Anyway, sure feels good to get her wet again!
That is some really nice welded stainless railing around that upper deck! You've got a sweet setup there!
 
Thanks for that PE…the guy I bought the house from fabbed up all those pieces in the workshop under the deck. From scratch…pretty impressive. When I moved in the deck was completed but dock had no railing …I’ll live with that I said to myself….who needs railing? then my dog fell off the dock on a low tide so that was my clue to shut up and finish the job….and my insurer telling me I was nuts to have that hazard on my property…I’m not a home improvement kind of guy…I just wanna go fishing….ha ha
 
What started out as replacing a float switch ( which wasn't needed as it turned out...I'm an idiot..don't ask) turned into adding a second float switch with a back up bilge pump with its own switch wired to its own battery as well as a high water bilge alarm.. and also adding an indicator light at the dash for the primary pump. Also replacing the primary pump with a new pump. Probably a little overkill but what the hey.

I also went down a rabbit hole on bilge pump switches and wiring. That's a whole other thread.
Never have enough pumps, if you ever taken on water you know what I mean, I have 3 hooked up and extra 1500 with gator ends as a extra lol, and insurance made me put the high water alarm after my first survey 6 year ago. Good job
 
I launched my Skagit Orca in Ucluelet one morning without the bilge plug. When I saw what I’d done I jumped back on board and fired up my Rule 3,000 GPH back-up bilge pump

It moved a huge amount of water back to where it should be….gave me enough time to run up to the parking lot and get the trailer back under the boat before it bottomed out on the ramp

Ever since then every boat I’ve owned since gets a 3,000 GPH Rule installed with the switch mounted in a handy place
 
Back
Top