You are using an out of date browser. It may not display this or other websites correctly.
You should upgrade or use an alternative browser.
You should upgrade or use an alternative browser.
Gardening pics, hacks, successes, and or failures
- Thread starter Breakin"even
- Start date
Alex_c
Well-Known Member
Mine are much smaller and I started them at the end of February.Mine are stunted too from junuary
Rain City
Crew Member
I started mine 1st week of April and then didn't put them outside until May 11th. But that was after killing three batches over the winter trying to start them early.Mine are much smaller and I started them at the end of February.
Alex_c
Well-Known Member
Maybe they had a chance to establish before the poo weather in June. I’m sure they’re thriving and I’m glad one sfbc member managed to grow some peppers this yearI started mine 1st week of April and then didn't put them outside until May 11th. But that was after killing three batches over the winter trying to start them early.
Rain City
Crew Member
Well I'm pretty much just doing whatever you tell me so you can take all the credit.Maybe they had a chance to establish before the poo weather in June. I’m sure they’re thriving and I’m glad one sfbc member managed to grow some peppers this year
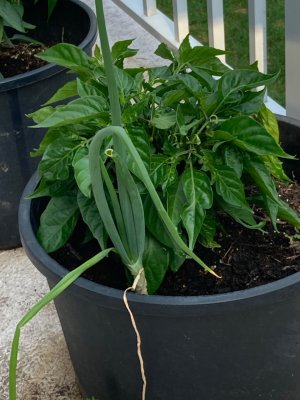
They've grown anther 6" this past week. Peppers are starting to form. Fingers crossed.
Alex_c
Well-Known Member
Awesome. If you want them to keep growing you can harvest the early peppers if there are only a few on the plant. If you let the peppers fully ripen early in the season the plant will have done its duty and won’t keep trying to produce. I’ve been pinching all my flowers to get the plants to grow bigger.Well I'm pretty much just doing whatever you tell me so you can take all the credit.
They've grown anther 6" this past week. Peppers are starting to form. Fingers crossed.
Depending where you are, root crops are always good for a fall/winter harvest. I’ve also been able to sneak in zukes after garlic, but depending on the fall weather that doesn’t always workI don’t have a ton of space when I yank out my garlic but what can I plant in its place at this time of the year? The wife and I aren’t fans of green beans.
IronNoggin
Well-Known Member
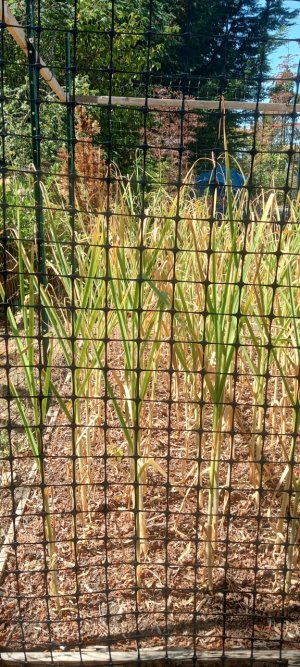
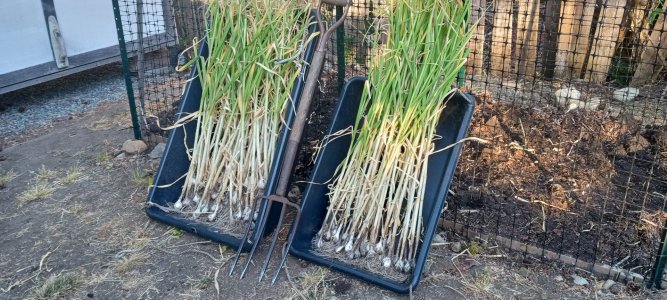
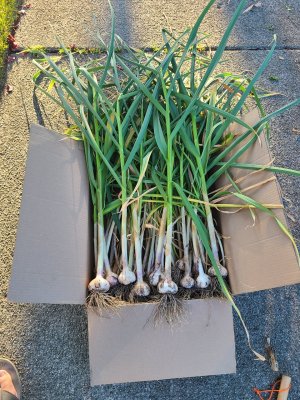
Garlic harvested yesterday - a tad late but wanted the temps down below 30 C to do so.

Somewhat smaller sizes than I am used to. Guessing a reflection of the cool spring and summer until the last little while.

Now hanging to cure:

We'll eat about 1/2 of that lot, and the other half will get turned into a granulated garlic powder mix.
Cheers

Somewhat smaller sizes than I am used to. Guessing a reflection of the cool spring and summer until the last little while.

Now hanging to cure:

We'll eat about 1/2 of that lot, and the other half will get turned into a granulated garlic powder mix.
Cheers
Rain City
Crew Member
Likely to do with planting 6 different varieties, but we had crazy mixed results. Varying from pretty damn good to pathetic. Most of the good ones will go to next years crop I'm guessing.Garlic harvested yesterday - a tad late but wanted the temps down below 30 C to do so.

Somewhat smaller sizes than I am used to. Guessing a reflection of the cool spring and summer until the last little while.

Now hanging to cure:

We'll eat about 1/2 of that lot, and the other half will get turned into a granulated garlic powder mix.
Cheers
wildmanyeah
Crew Member
What varieties did the best??
IronNoggin
Well-Known Member
Most of the good ones will go to next years crop I'm guessing.
Used to do that myself, but always disliked putting my best back into the ground rather than eating them.
Around a decade ago now, I decided to explore other options. If you have the room and a little patience, you might want to consider this method.
The scapes eventually ripen into a bulbil packing sphere. I leave around a half dozen to do this each year now. These are this years still in the ground to finish ripening:

Eventually they will look like this and are close to harvest time:

I cure these in mesh bags, then hang for the winter in our cold room.

In the spring the individual bulbils get separated and planted into planters' boxes. They grow quickly over the summer:

These produce singular small clones - most will not be sectioned cloves, rather singular and about the size of a marble.
And these are what we plant that same fall:


That allows us to chow down on the best we produce, and we still get full sized bulbs from those plantings.

Win Win in my books.
Cheers
Rain City
Crew Member
Love it. Thank you.Used to do that myself, but always disliked putting my best back into the ground rather than eating them.
Around a decade ago now, I decided to explore other options. If you have the room and a little patience, you might want to consider this method.
The scapes eventually ripen into a bulbil packing sphere. I leave around a half dozen to do this each year now. These are this years still in the ground to finish ripening:

Eventually they will look like this and are close to harvest time:

I cure these in mesh bags, then hang for the winter in our cold room.

In the spring the individual bulbils get separated and planted into planters' boxes. They grow quickly over the summer:

These produce singular small clones - most will not be sectioned cloves, rather singular and about the size of a marble.
And these are what we plant that same fall:


That allows us to chow down on the best we produce, and we still get full sized bulbs from those plantings.

Win Win in my books.
Cheers
Last edited:
Rain City
Crew Member
I think it's the red russian?What varieties did the best??
IronNoggin
Well-Known Member
First batch of Blackberries is ready for picking:


Likely 2.5 - 3 gallons this go with a lot more to come.
Cheers


Likely 2.5 - 3 gallons this go with a lot more to come.
Cheers
IronNoggin
Well-Known Member
This first lot largely goes into my favorite jam recipe:
Peach and Blackberry Jam
Ingredients:
3 cups (750 ml) crushed or finely chopped peaches, about 3 lb (1.4 kg)
2 cups (500 ml) blackberries, about 3/4 lb (350 g), 1 pint
2 tbsp (30 ml) lemon juice
1.5 pkg (57 g) BERNARDIN® Original Fruit Pectin
6 cups (1500 ml) granulated sugar
1/2 tsp (2 ml) ground cinnamon
1/4 tsp (1 ml) ground ginger
Directions:
Place 6 clean 250 ml mason jars on a rack in a boiling water canner; cover jars with water and heat to a simmer (180°F/82°C). Set screw bands aside. Heat SNAP LID® sealing discs in hot water, not boiling (180°F/82°C). Keep jars and lids hot until ready to use.
Blanch, peel, pit and finely chop or crush peaches one layer at a time. Measure 3 cups (750 ml) peaches. Measure sugar; stir in cinnamon and ginger and set aside.
In a large deep stainless steel saucepan, combine peaches, blackberries and lemon juice, 1/2 tsp (2 ml) butter or margarine to reduce foaming. Gradually add BERNARDIN® Original Pectin, stirring until dissolved. Over high heat, bring mixture to a full rolling boil. Add all of the sugar – spice mixture. Stirring constantly, return mixture to full rolling boil that cannot be stirred down. Boil hard 1 minute, stirring constantly. Remove from heat; skim off foam, if necessary.
Ladle hot jam into a hot jar to within 1/4 inch (0.5 cm) of top of jar (headspace). Using nonmetallic utensil, remove air bubbles and adjust headspace, if required, by adding more jam. Wipe jar rim removing any food residue. Centre hot sealing disc on clean jar rim. Screw band down until resistance is met, then increase to fingertip tight. Return filled jar to rack in canner. Repeat for remaining jam.
When canner is filled, ensure that all jars are covered by at least one inch (2.5 cm) of water. Cover canner and bring water to full rolling boil before starting to count processing time. At altitudes up to 1000 ft (305 m), process – boil filled jars – 10 minutes.*
When processing time is complete, turn stove off, remove canner lid, wait 5 minutes, then remove jars without tilting and place them upright on a protected work surface. Cool upright, undisturbed 24 hours; DO NOT RETIGHTEN screw bands.
After cooling check jar seals. Sealed discs curve downward and do not move when pressed. Remove screw bands; wipe and dry bands and jars. Store screw bands separately or replace loosely on jars, as desired. Label and store jars in a cool, dark place.
IronNoggin
Well-Known Member
The garlic scapes have formed their heads, ripened to the point of bursting, and are now ready for harvesting:


I'll be taking them down today and hanging them in mesh bags to cure.
Also will be harvesting the bulbs that produced them.
These will form the next planing of our seed stock, and become the main planting stock a year from October.
Cheers,
Nog


I'll be taking them down today and hanging them in mesh bags to cure.
Also will be harvesting the bulbs that produced them.
These will form the next planing of our seed stock, and become the main planting stock a year from October.
Cheers,
Nog
wildmanyeah
Crew Member
IronNoggin
Well-Known Member
Peach Time!
Had a fairly good crop this year.


Past couple days have been busy dealing with the harvest and canning.


The last of them will come down today and tomorrow - headed for my favorite jam: Peach & Blackberry!
YUM!
Had a fairly good crop this year.


Past couple days have been busy dealing with the harvest and canning.


The last of them will come down today and tomorrow - headed for my favorite jam: Peach & Blackberry!
YUM!
Similar threads
- Replies
- 26
- Views
- 5K
- Replies
- 11
- Views
- 2K
- Replies
- 0
- Views
- 1K
- Replies
- 5
- Views
- 1K

