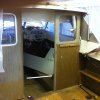
23' & 26' Hourston Project Commenced...

What to do?

  • Try and keep the boat and complete the project.

    Votes: 71 71.0%
  • Sell the boat in current hot market.

    Votes: 8 8.0%
  • Notch the transom for outboard.

    Votes: 5 5.0%
  • Add extension bracket for outboard.

    Votes: 57 57.0%
  • Install twin outboards.

    Votes: 42 42.0%
  • Install single outboard.

    Votes: 27 27.0%
  • Add command bridge.

    Votes: 15 15.0%
  • Remove command bridge.

    Votes: 42 42.0%
  • Accept "crowd funding"

    Votes: 29 29.0%
  • Do not accept "crowd funding"

    Votes: 16 16.0%

  • Total voters
    100
Sorry for detailing your thread Robert. I should have known that would happen haha

No worries my man, all good! Sounds like you guys have allot in common :) Its a great time to try and raise spirits...
 
Last edited:
O no, what did I do? rrrr!

Brushless motors hopefully next to that open can of acetone I hope. Don't make mistakes now.. nice work. You probably could have encapsulated it but heavier and well you know it has to be done perfect! I'm doing a rotted house beam lol!
My boat hardtop is convex instead of concave.. Valley instead of peak. I don't know what I will do. Reno house first and then pick up boat in Alberta.
 
Last edited:
Hey, good point. Would you think if I had windows in the Alaskan bulkhead it would provide the see-through visibility needed?

With my canvas dodger, I can't look directly over the cabin roof from the stern station, but I can see forward thru the Alaskan bulkhead and cabin windows. If you have a stand-up head, it would create a blind spot, but not too bad if its on the opposite side as the steering.
 
Brushless motors hopefully next to that open can of acetone I hope. Don't make mistakes now.. nice work. You probably could have encapsulated it but heavier and well you know it has to be done perfect! I'm doing a rotted house beam lol!
My boat hardtop is convex instead of concave.. Valley instead of peak. I don't know what I will do. Reno house first and then pick up boat in Alberta.

Are you replacing the beam with an lvl?any pictures of your roof...?
 
To answer your question about a bulkhead window...my Seasport has 3 bulkhead windows..one on either side of the door and 1 in the door itself. I seldom bend down to look ahead through the windows...much easier to look over the roof and less obstructed. I look in the windows to see what is going on in the cabin with my guests. I'm 6 ft so looking over is easier than bending down...that would be different for someone shorter.
 
Hey guys, can anyone help me out? I am looking for location of bulkhead and some pictures of this area...

I am not sure how the bulkhead is fastened to roof, sides or deck? Any support would be very greatly appreciated, Thank you

Remember this is the long cabin version :eek:

Also any suggestions, head liner or paint to finish the inside/underside roof?

IMG_0037.jpeg IMG_0036.jpeg
 
IMG_3032.JPG DSCF5378.JPG IMG_2956.JPG ou cut out your panels and then side them from center to the port and starboard sides. They screw in from the inside at the top to a fiberglassed cleat on the roof. The bottom there is a cleat on the inside of the cabin you screw from the outside in on that one, the floor molding will cover the screws. There is a trim piece that is slotted that goes from the gunnel to the roof. Once the 2 sides are in there is a center piece above the door. then all the door trim. The gunnel shelve support also makes up part of the slot the wall sides into.
 
Last edited:
Would anyone have any measurements for me? I guess from back of outside roof to front of bulkhead would be same same no matter which cabin/roof length you have... thank you
 
Anyone?? LOL

index.php
 
Thank you for the measurement "ductility". you are awesome! :D

Here are some updated pictures...

So what I ended up doing was, reuse the support rib I removed after I dried it out and I got it cleaned up. I infilled the very back portion that i removed after I discovered water damage/rot with new 3 x 1/2" marine plywood and some 1/4" plywood. I wanted to get as much plywood to fill this void as possible and it's now is flush with adjacent. I also, sanded and infilled the joints flush and applied cm over this area...

I will have no issues for mounting the ladder or rocket launchers to the back cab/roof , lots of backing to fasten too. :eek:

IMG_0058.jpeg IMG_0057.jpeg IMG_0056.jpeg IMG_0042.jpeg IMG_0041.jpeg IMG_0040.jpeg IMG_0047.jpeg
 
Last edited:
So I have no idea what I'm actually talking about here but in trying to decipher how that goes back together I had assumed the paneling on the bulkhead lapped over the recessed portion to create a shingle effect thus not allowing water to penetrate into the wall. Hasn't filling that in now eliminated that? Or was my assumption way off?
 
:confused:
So I have no idea what I'm actually talking about here but in trying to decipher how that goes back together I had assumed the paneling on the bulkhead lapped over the recessed portion to create a shingle effect thus not allowing water to penetrate into the wall. Hasn't filling that in now eliminated that? Or was my assumption way off?

Good point but Honestly I have zero idea, I never put one together or taken one apart... lol

I plan on laminating the bulkhead in anyways so I’m not to worried about the “shingle effect”, which makes sense btw. fyi the drip edge still remains, it’s not infilled to that total depth enough to burry the edge so app 1/2” of edge depth remains. Did I say good point!

I guess I can always router in extra depth to the drip edge if in fact that was the designs intent or maybe they just cheaped out on the build :confused:
 
Last edited:
:confused:

Good point but Honestly I have zero idea, I never put one together or taken one apart... lol

I plan on laminating the bulkhead in anyways so I’m not to worried about the “shingle effect”.fyi the drip edge still remains, it’s not infilled to that total depth enough to burry the edge so app 1/2” of edge depth remains. Did I say good point!

I guess I can always router in extra depth to the drip edge if in fact that was the designs intent or maybe they just cheaped out on the build :confused:
Maybe a bit from column A and a bit from column B
 
“Think like a water droplet” my old boss used to say!

is this like “become one” with the boat, that way I can tell you everything... lovit haha

not sure but at the time it seemed like a good idea, the ladder fastening screws were not even in any plywood, which is why I decided to add material, not too mention safety but then again it lasted 40+ years the way it was...

o well it is what it is for now as I said I can always router out a bit to expose more of the drip edge if it becomes problematic
 
Last edited:
Hey does anyone have a picture of a "Capacity Plate" for the 26'er? I know the older ones don't have but anything on the newer "Sportfish" models?

Unknown.png
 
FYI - Yamaha 300 SOLD. It was created this morning, money deposit received and on transport to its new home on the Island :) This motor was initially purchased for the 23'er and we all know that boat is long gone, now so too is the motor so the fun begins again...! :eek: need more ponies for the 26'er. I kept the new SeaStar steering rigging as its only a year old and in hopes I can use it on the next setup...

IMG_6054.jpeg IMG_0012.jpeg IMG_0088.HEIC.jpeg
 
Last edited:
Back
Top