
myles
Well-Known Member
That's a real bummer! WORST possible timing for a breakdown with long lead parts...Downhill perhaps! You're definitely going to beat me back onto the water, man...blah this blows.
That's a real bummer! WORST possible timing for a breakdown with long lead parts...Downhill perhaps! You're definitely going to beat me back onto the water, man...blah this blows.
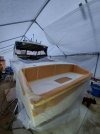
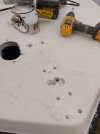
The area that requires spot repair (burn through) needs to be scuffed with 120-180 grit (some guys like 80). Then shoot on a couple of coats of gel and wait for it to cure. After full cure, start sanding out the orange peel with 800 as it reduces the chances of burning through. Work up through the sandpaper grits back to whatever level of finish you require and then polish the gel and the repair shouldn't be noticeable if the same colour gel is used.Great work.
So if you are wetsanding down to 2000 or 3000, then you need to shoot on some more gelcoat on thin spots, do you need to rough it up again with 800?
I have a few brush marks in my new gelcoat from last year that I need to wetsand some more in places.
I'm going to try a Preval sprayer and some styrene if I need more.
I probably need some of the carbon stuff for showing low spots, too.
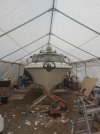
With these projects, there are days where I feel like a winner and some days where I feel like it will never end. It's a process and the only way through it is to get in that tent and get to work! Lots of trial and error. You have to be a special kind of idiot to do something like thisMyles, it’s people like you who make me wonder what I’ve done with my life.
Great job, looks just excellent.
")

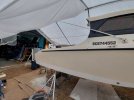

It needs a cool custom badge like Hourston 22ET or something.Your boat looks awesome. Can’t wait to see it in the water. Are you going to rebadge the Hourston stickers on the boat? If not you’re going to be asked a lot “what make of boat is that” at the docks.
Oly
That is a great ideaIt needs a cool custom badge like Hourston 22ET or something.
Hourston ET Cobra
Hourston MET
Hourston LOL (labor of love)


Thanks dude, but remember I don't show pictures of all my mistakesLooks fantastic. Can not wait to see pics of her in the water. You really do great work
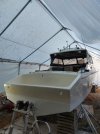
If you see my rear non-skid catastrophe on the transom you will know what I meanJust over 3k CND. Almost double other high-end systems but I didn't have to make recessed trim tab pockets on the boat, as there is no space for tabs the hanging way out because the kicker would hit them since the 20' is a narrow hull. The amount of time I saved not making pockets well exceeded the premium cost of the Zipwakes. Additionally, I get automatic trim tabs and higher efficiency so as painful as it was to shell out 3k i don't regret it at all. They are the highest quality, best laid out system I have installed in a boat hands down. The software and interface is impressive make the Bennett system look like it's from the Stone Age. Hopefully they work! Apparently, they provide lots of stern lift which is something all 20' Hourstons need so maybe they will be the solution for proposing. fingers crossed.Wow amazing work
What did the zipwake package end up costin?
HAHA, O the memories... Wow Myles, just reading thought what I missed, you have been busy. Amazing work my friend, well done! I can relate to the "idiot" partThanks dude, but remember I don't show pictures of all my mistakes
That project sure is something to be proud of... www.fastmount.com
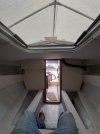
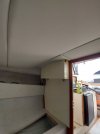
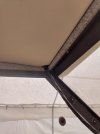
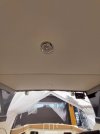
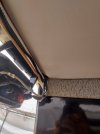
Did you order direct or is there a location retailer?Also if anyone is interested in the panel mounting system I used it's called Fastmount. If you are doing a headliner or even bolsters and side panels then I would highly recommend it. They snap into place and remove with a small tool very easily. A nice alternative to fasteners that can eventually strip out.
Standard Range – Fastmount™ Panel Mounting
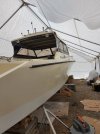
oh yah I'm a total idiot! My next big job is the topside Gelcoat. It's tired and will polish up nicely but its patchy and aged from the previous owner. So i will be re-gel the topside eventually and might as well do the hull at the same time since it's far from perfect LOL im going to need a pickup truck load of sandpaper.HAHA, O the memories... Wow Myles, just reading thought what I missed, you have been busy. Amazing work my friend, well done! I can relate to the "idiot" part
 . That thing is sexy as hell.