You are using an out of date browser. It may not display this or other websites correctly.
You should upgrade or use an alternative browser.
You should upgrade or use an alternative browser.
Commander 26 Re Build
- Thread starter Sttr
- Start date
ship happens
Crew Member
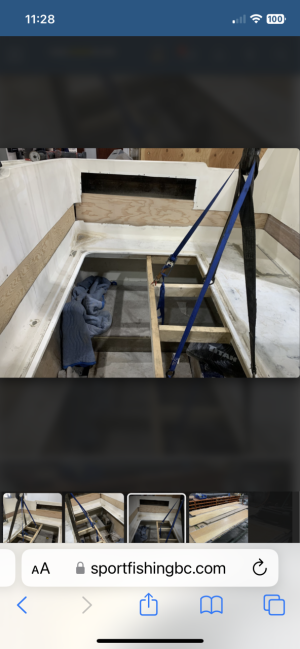
It’s gonna take a bit of tweaking to get it leveled perfectly, there will also be 4 posts connecting the deck to the floor, at first they will be in there temporarily for support and to keep it leveled. It’s gonna be a *****
First the deck will be sandwiched to the door way leveled side to side, let it dry, then level it front to back.
Deck height to waterline is confirmed OK
I remember going over than a while back, one of the reasons I didn’t do a 8” drop
Ohh sorry by deck level I meant the distance from the water line. Poor discription on my part. That being said the scupper system is another topic.
From factory, the thru hulls to drain the deck were 8” above the water line, and that’s with a bulky straight fitting down.
View attachment 99452
Yep that sums it up. That's what I was curious about right there.
Be real nice to have big slotted suppers out the back corners and have that deck on a super light slant. It puts the hatches in term oil but hey that's why we build boats lol
Sttr
Crew Member
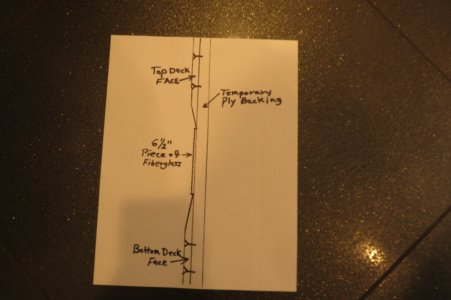
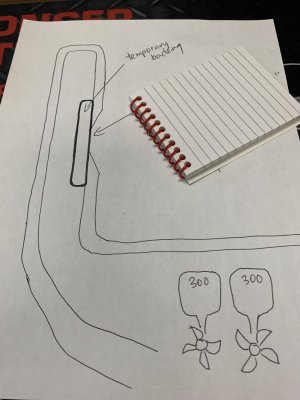
You are right, I will have to get rid of the ply to glass it behind, if I choose that route. However that won’t work on the front of the cabin, and I’m not sure if I can reach around the transom to glass it there. Gonna put the deck into place again and take another lookIf you want it to look like it came from factory when finished it will have to be flush face with existing glass.I assume the plywood you have behind it now is temporary just to hold it at the right height.You could make templates of the gap between existing and lay up outside the boat and then cut to template. Put in a couple of screws to hold them in place,bevel grind top and bottom.glass the joints.Remove the plywood supports when fiberglass cures and then fiberglass the back side.Should be seamless once you use your drywall skills filling the joint with thickened gelcoat and sand,fill,sand again. etc..
Rayvon
Well-Known Member
Not sure we're on the same page on this,I don't see why it won't work on the back of cabin either side of the door.When I said put fiberglass that you layed up on a table outside the boat and then cut to your gap template it would -not -be glassed to your backing plywood that holds it at the right height.It would be fitted in dry and then glassed after you bevel grind the fiberglass above and below the gap.That fastens the front face so you can remove temporary plywood behind.Then it will be flush on the back side for glassing.Are we talking the same process?
Last edited:
Sttr
Crew Member
I get installing it dry and glassing the bevel grind up top and bottom, remove the ply and glass it all from the back. I don’t get how this will work on the door way installed dry ( because there is no ply to remove from the back, just a wall) unless I leave it unbonded to the cabin wall
Which might not be a big deal, the original deck wasn’t bonded all the way down.
My thoughts was to fill in the deck like we filled the bottom of the hull, but that’s a ton of work and I’m not sure if it would look close to factory.
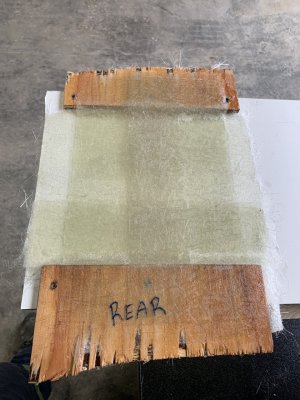
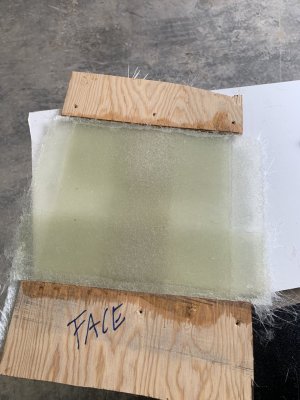
Another way I’m think about now is to flip the ply from the back to the face of the deck, set my template into place and glass it all from the back, then bevel and glass the edges, or instead of ply just mount a melamine board to the face and glass it all from the back.
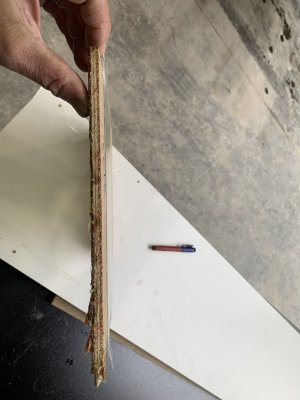
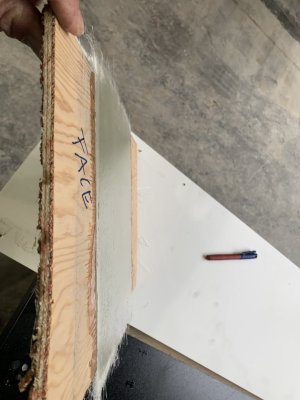
Either way I never done a template mold, I’m playing around with some stuff now, just drying, will c how it turns out.
And no I’m not on the same page as you yet, need to read up a bit more to catch up to ya
I can’t see myself matching the depth of the template to the deck with ply installed at the back, that might be throwing me off
Last edited:
ship happens
Crew Member
Go buy a few sheets of 3/4 and some 1/2 inch coosa board and build a proper deck with built in fish and storage boxes and a proper scupper system. Paint the entire things with kiwi grip and who cares about looking factory.
Sttr
Crew Member
Diamond plate the seam all aroundGo buy a few sheets of 3/4 and some 1/2 inch coosa board and build a proper deck with built in fish and storage boxes and a proper scupper system. Paint the entire things with kiwi grip and who cares about looking factory.
ship happens
Crew Member
Coosa the sides too! Stuff is awesome. Takes paint, epoxies, gel coat whatever right onto the material with zero prepping.Diamond plate the seam all around
Rayvon
Well-Known Member
I guess I'm not splaining my thoughts very well and there's more than 1 way to do it.You have 2 finished surfaces that you want to connect (top and bottom deck) You say that the gap is about 6 1/2" approx. and that is what I'm saying to template if it's an irregular shape.If it's 6 1/2" exactly you don't need a template.If you install a thin fiberglass piece in the gap,all you need to do is glass the top and bottom pieces to it.I would have put wax paper or arborite on the back pieces of ply to ensure your new glass doesn't stick to it so that it can be removed.Just one guys opinion,how I would do it.
Sttr
Crew Member
I get it, except how to temporarily secure the piece of fibreglass ( or template… whatever) flush with the face before I glass the top and bottom, if I screw it to the backing I’m sure the depth will be of a bit, or maybe I’m mistaken and it will all be straight after taking the backing off.I guess I'm not splaining my thoughts very well and there's more than 1 way to do it.You have 2 finished surfaces that you want to connect (top and bottom deck) You say that the gap is about 6 1/2" approx. and that is what I'm saying to template if it's an irregular shape.If it's 6 1/2" exactly you don't need a template.If you install a thin fiberglass piece in the gap,all you need to do is glass the top and bottom pieces to it.I would have put wax paper or arborite on the back pieces of ply to ensure your new glass doesn't stick to it so that it can be removed.Just one guys opinion,how I would do it.
Anyways thanks for the input! Your right on the money, and yes there’s multiple ways to skin a cat.
Rain City
Crew Member
Glass a strip on the back side of each piece. Overlap the strips and fill the **** out of it. You could even do it in sections if you wanted to get back there and goop it all together in the back. Leaving working holes that you can fill in later. Like underpinning a foundation, duh.I get it, except how to temporarily secure the piece of fibreglass ( or template… whatever) flush with the face before I glass the top and bottom, if I screw it to the backing I’m sure the depth will be of a bit, or maybe I’m mistaken and it will all be straight after taking the backing off.
Anyways thanks for the input! Your right on the money, and yes there’s multiple ways to skin a cat.
Sttr
Crew Member
That makes sense,

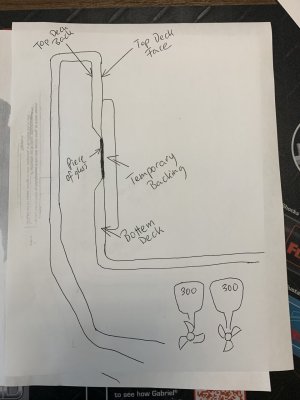
Let me paint a bigger pictureHope this helps. There's no way around a bunch of filling after you glass the front face if you want front and back glassed which is a must.
View attachment 99486

salmonkiller01
Well-Known Member
Glass the back side of you backing , place the floor to height, screw in place to hold solid start laying up glass to join surfaces surfaces. Remove screws finish lay up Will be 1/4-5/16 build up of glass? Just make sure you do 4-5” taper of the old surfaces so you get a solid join. At some point you will have to fair it and gelcoat.
Seems like lots of work but the prep is the hardest. You could use coosa or even make you own fibreglass sheeting for the backing Do not think you need to glass behind at all
Making great progress and will be so awesome in the end
Seems like lots of work but the prep is the hardest. You could use coosa or even make you own fibreglass sheeting for the backing Do not think you need to glass behind at all
Making great progress and will be so awesome in the end
bryce
Crew Member
I wonder how it would go with 4 blade props
Rayvon
Well-Known Member
Yup,another way to skin a cat.If your going to leave the backer piece in ,there's no need to put a fiberglass piece in the gap,just layup onto the bevelled surfaces and backer all at once.I was trying to keep it all solid fiberglass,no ply in finished job.It would look like it was built that way originally.Glass the back side of you backing , place the floor to height, screw in place to hold solid start laying up glass to join surfaces surfaces. Remove screws finish lay up Will be 1/4-5/16 build up of glass? Just make sure you do 4-5” taper of the old surfaces so you get a solid join. At some point you will have to fair it and gelcoat.
Seems like lots of work but the prep is the hardest. You could use coosa or even make you own fibreglass sheeting for the backing Do not think you need to glass behind at all
Making great progress and will be so awesome in the end
Rain City
Crew Member
I still don't see why you couldn't use two strips in behind before you installed the plywoodYup,another way to skin a cat.If your going to leave the backer piece in ,there's no need to put a fiberglass piece in the gap,just layup onto the bevelled surfaces and backer all at once.I was trying to keep it all solid fiberglass,no ply in finished job.It would look like it was built that way originally.
salmonkiller01
Well-Known Member
Similar threads
- Replies
- 27
- Views
- 3K
- Replies
- 11
- Views
- 1K
- Replies
- 8
- Views
- 2K
- Replies
- 24
- Views
- 3K

