What Did You Do To Your Boat This Week?

I’ve been telling anyone who will listen that oilbath hubs are the only way to go. Seems like people are weary about going away from the way they’ve always known, which is typically grease hubs. There is virtually zero effort involved in changing out the fluid annually, and you can visually inspect the trailer each time you launch it to see if there’s any water intrusion that would require attention. With grease hubs it’s a mystery if there’s any contamination inside, and when there is we all know that water sits insides the voids in the grease and rusts out your bearings which leads to failures. In addition the grease hub caps and bearing buddies are not very waterproof at all, it’s a lose lose.
Yes, yes, and yes! Can you recommend a good place to buy oil bath hubs? I may just retrofit when I service next.
 
It seems this Vault system is very reliable too. Its a hybrid between grease and oil; when cold (trailer standing) its grease but once at operating temperature the grease turns liquid. 10 year maintenance free warranty. Got pver 9 years out of the first set. Without doing anything to it and with thousands of km on the trailer. Happy with that.
 
It seems this Vault system is very reliable too. Its a hybrid between grease and oil; when cold (trailer standing) its grease but once at operating temperature the grease turns liquid. 10 year maintenance free warranty. Got pver 9 years out of the first set. Without doing anything to it and with thousands of km on the trailer. Happy with that.
Same here. Tuff trailer with vault and maintence free for many years and long distances trailered.
 
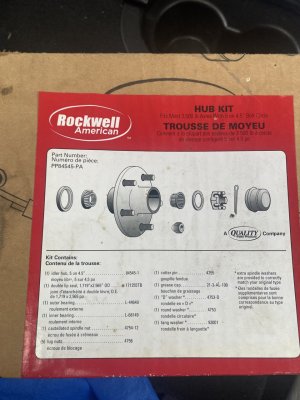
I converted my grease hubs to oil bath with this kit from Kodiak. You would likely want to do stainless speedi-sleeves for the seal surface.

Thanks for this. I was not aware it was easy conversion. I hate the grease packing process. Messiest maintenance job.
So these kits work with any hub?
How do the speedy sleeves come into play?
What do you carry with you for road side repairs if you were to have an issue?
 
Speedy sleeves are pressed on to the spindle to give a true smooth finish for the hub to turn on.
Trick is to find the correct diameter sleeve and then press it into place without damaging the thin metal.
 
I’ve been telling anyone who will listen that oilbath hubs are the only way to go. Seems like people are weary about going away from the way they’ve always known, which is typically grease hubs. There is virtually zero effort involved in changing out the fluid annually, and you can visually inspect the trailer each time you launch it to see if there’s any water intrusion that would require attention. With grease hubs it’s a mystery if there’s any contamination inside, and when there is we all know that water sits insides the voids in the grease and rusts out your bearings which leads to failures. In addition the grease hub caps and bearing buddies are not very waterproof at all, it’s a lose lose.
Just curious, what's involved in converting? Is it just cleaning out the grease, and new seal? Do you loose any oil out of the rear seal - any risk of contaminating the brake surface? Any issues converting an older trailer (eg any imperfections in the spindle causing the seal to not work?).

I launch in fresh water, so its pretty forgiving and after 2 years just topping up my bearing buddies my grease still looked brand new.
 
Thanks for this. I was not aware it was easy conversion. I hate the grease packing process. Messiest maintenance job.
So these kits work with any hub?
How do the speedy sleeves come into play?
What do you carry with you for road side repairs if you were to have an issue?
They have a few sizes on the website, buy the kit that has the same spec as your bearing buddies. They offer two different size axles (2.440”, and 1.98”). The Speedi sleeve is a thin piece of stainless that is installed on the spindle at the rear seal location, it ensures a smooth surface that is free from pitting and rusting of the surface. Use a digital to measure your spindle, then reference the size using this document..


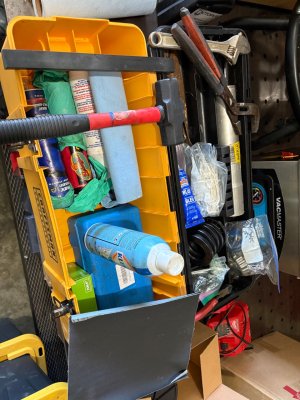
I purchased my speedi-sleeves off of rock auto, they were less than half the price of lordco, even with my account. As for roadside repairs, I carry with me a dedicated toolbox that includes.. cotter pins, castle nut, channel locks, crescent wrench, 1/2” combination wrench, some string to hang the brake caliper, hub oil, full set of inner and outer bearings and races, rear seals, 1 extra speedi-sleeve, a piece of exhaust pipe to install the speedi-sleeve (the pipe goes over the spindle and is used to hit against an old bearing that pushes the sleeve onto the spindle) a seal driving kit, a small sledge hammer, steel flat bar to hammer out races, emery cloth, shop towels, brake clean, some RTV if one of the caps o-rings were to fail, side cutters, and a couple tubes of grease should there be a complete failure with the oil bath system, I can just pack the bearings with grease and still make it home.

I’ve been running my oil bath system for 3 years now and didn’t even change the oil until this year, not a single issue. Ask your local trailer shop what they think about grease hubs on a boat trailer, and they will likely tell you that bearing buddies are what keep them in business.
IMG_7115.jpeg
 
Just curious, what's involved in converting? Is it just cleaning out the grease, and new seal? Do you loose any oil out of the rear seal - any risk of contaminating the brake surface? Any issues converting an older trailer (eg any imperfections in the spindle causing the seal to not work?).

I launch in fresh water, so it’s pretty forgiving and after 2 years just topping up my bearing buddies my grease still looked brand new.
I would install a new set of bearings and races, you could clean your old ones but that’s a laborious process. Once the grease is out of the hub, hammer in the aluminum adaptor with an appropriate hammer so you don’t damage the aluminium ( install your outer race and bearing first), new rear seal, and speedi sleeve while you’re at it, which will take care of any imperfections on the spindle, giving you a new stainless surface for the seal to ride on, resulting in no loss of oil and protection from water ingress.
 
They have a few sizes on the website, buy the kit that has the same spec as your bearing buddies. They offer two different size axles (2.440”, and 1.98”). The Speedi sleeve is a thin piece of stainless that is installed on the spindle at the rear seal location, it ensures a smooth surface that is free from pitting and rusting of the surface. Use a digital to measure your spindle, then reference the size using this document..


I purchased my speedi-sleeves off of rock auto, they were less than half the price of lordco, even with my account. As for roadside repairs, I carry with me a dedicated toolbox that includes.. cotter pins, castle nut, channel locks, crescent wrench, 1/2” combination wrench, some string to hang the brake caliper, hub oil, full set of inner and outer bearings and races, rear seals, 1 extra speedi-sleeve, a piece of exhaust pipe to install the speedi-sleeve (the pipe goes over the spindle and is used to hit against an old bearing that pushes the sleeve onto the spindle) a seal driving kit, a small sledge hammer, steel flat bar to hammer out races, emery cloth, shop towels, brake clean, some RTV if one of the caps o-rings were to fail, side cutters, and a couple tubes of grease should there be a complete failure with the oil bath system, I can just pack the bearings with grease and still make it home.

I’ve been running my oil bath system for 3 years now and didn’t even change the oil until this year, not a single issue. Ask your local trailer shop what they think about grease hubs on a boat trailer, and they will likely tell you that bearing buddies are what keep them in business.
View attachment 117250
This is really good info! Thanks for the detailed reply.
 
I would install a new set of bearings and races, you could clean your old ones but that’s a laborious process. Once the grease is out of the hub, hammer in the aluminum adaptor with an appropriate hammer so you don’t damage the aluminium ( install your outer race and bearing first), new rear seal, and speedi sleeve while you’re at it, which will take care of any imperfections on the spindle, giving you a new stainless surface for the seal to ride on, resulting in no loss of oil and protection from water ingress.
Where were you a few nights ago when I had brand new clean hubs to work with? LOL
Sounds like same process as greasy hubs without the grease. Oil bath is just like a bearing buddy.
2 years from now I will do this again and probably convert.
 
Thanks for this. I was not aware it was easy conversion. I hate the grease packing process. Messiest maintenance job.
So these kits work with any hub?
How do the speedy sleeves come into play?
What do you carry with you for road side repairs if you were to have an issue?
The speedy sleeve is only for a new sealing surface
 
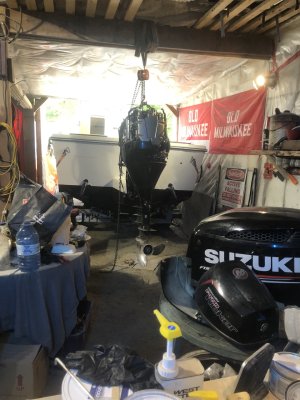
Got the right ignition shipped to me today, so had the boys running the main harness with me after dinner. Pretty happy to have any help, and my son’s best friend is keen so I’m only down two slurpees, vs paying a mechanic to do the grunt work! Pretty lucky since I unexpectedly had a plumber at the house all day replacing a recirculation pump.

Got a complete old seastar kit for a great deal from a member so heading back out now to piece that back together after getting the kids to bed.
IMG_5778.jpeg
 
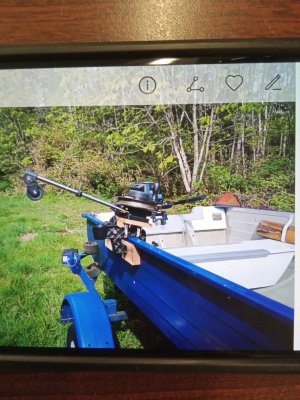
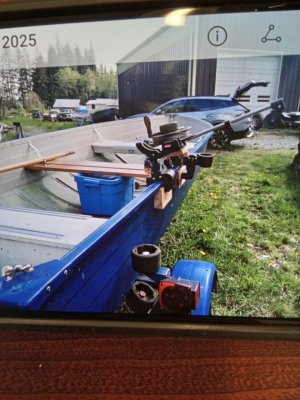
Think this downrigger setup would work? Or should I get a proper clamp instead of using an old humminbird buddy clamp?
 

Attachments

  • 20250430_171330.jpg
    20250430_171330.jpg
    248.2 KB · Views: 56
  • 20250430_171358.jpg
    20250430_171358.jpg
    214.5 KB · Views: 56
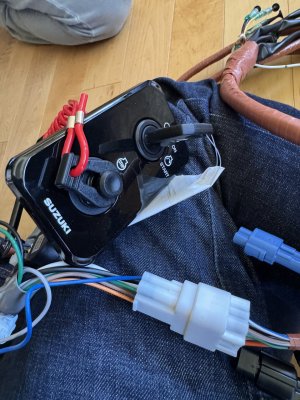
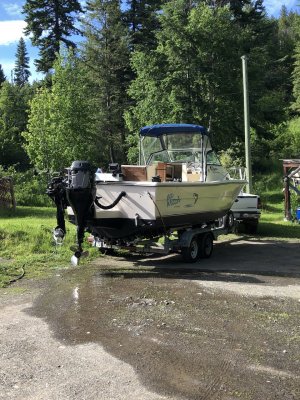
Install instructions for the Suzuki ignition show .5 hours. Pretty sure that time it doesn’t include returning the wrong push button ignition to Vancouver by courier, buying and cutting starboard, buying a set of hole saws, taking a slurpee brake for the 8/9 year olds who are “helping” out. 98% done just need to wire up the trim.

Tip for those thinking of repowering, don’t re-use 18 year old controls. Even in a cabin, salt has a way of getting into all things mechanical. Got the old Morse/Teleflex controls working now but would prefer the new Suzuki binnacle which is still in transit.IMG_5836.jpeg
 
Install instructions for the Suzuki ignition show .5 hours. Pretty sure that time it doesn’t include returning the wrong push button ignition to Vancouver by courier, buying and cutting starboard, buying a set of hole saws, taking a slurpee brake for the 8/9 year olds who are “helping” out. 98% done just need to wire up the trim.

Tip for those thinking of repowering, don’t re-use 18 year old controls. Even in a cabin, salt has a way of getting into all things mechanical. Got the old Morse/Teleflex controls working now but would prefer the new Suzuki binnacle which is still in transit.View attachment 117340
Funny I mounted mine exactly the same way, but I took the Honda out 🤮🤮👍
 
Back
Top