
You are using an out of date browser. It may not display this or other websites correctly.
You should upgrade or use an alternative browser.
You should upgrade or use an alternative browser.
Project 'Bad Habits' Build
- Thread starter Finished Business
- Start date
Finished Business
Well-Known Member
If I can continue going at it I'd like to think March/April freshwater trials. Fishable for June/July. I bought this project boat in the last week of March, 2012. With luck, 1 year later, she will be making her first water trials around that date.
Finished Business
Well-Known Member
Pod Construction:
Making final measurements before finish welding...looks like a nice barn for the horses!


In the background is the master builder, Pawel, from Streamline Boats in Maple Ridge.
Cheers!
Making final measurements before finish welding...looks like a nice barn for the horses!
In the background is the master builder, Pawel, from Streamline Boats in Maple Ridge.
Cheers!
ComfortZone
Member
so will it be welded on or bolted on??
Finished Business
Well-Known Member
through bolted around the perimeter of the pod, and from the inside of the bracket. Welding will be done to hold the corners down more or less...
ComfortZone
Member
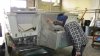
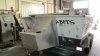
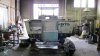
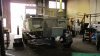
popped by FB shop today, he was nice enough to weld up my pulpit...while in the shop gave him a hand mocking the pod to prepair for permanent installation, reused what existing holes possible and drilled the necessary remaining holes...thought I would share some pics
Attachments
Finished Business
Well-Known Member
...what CZ said!
Got to a few projects today once the welder got hot...
Forward seat posts were welded up and are ready to be mounted once the threaded floor plates are welded down. Got the cabin sides installed along with a little bit of work to the fish box. I welded up a fish box recently

and began putting it in its place in the previous inboard engine bay. I've got a couple simple doors on the transom on both port and starboard side, giving me access to the drain points and the rear cranking battery. (not yet installed)

This week I hope to tie in the last of the metal work so I can get the windows installed.
I decided to go with the two side windows by AJR Windows, in Port Coquitlam. Saw these guys at both boat shows, as well as their windows on nearly every alloy boat at the show. I opted for a framed, forward sliding window on the driver side, and a framed fixed window on the passenger side. The windshield will remain laminated safety glass with the rubber mounting.
Big hand to NU DIMENSIONS in Delta as well. They've continued to be quite helpful in finding time to get my small projects on the cutter. Their work really adds a nice touch to a rough boat. Thanks guys!!
More updates to follow in the coming week. Still trying for an early April launch.
Cheers
Got to a few projects today once the welder got hot...
Forward seat posts were welded up and are ready to be mounted once the threaded floor plates are welded down. Got the cabin sides installed along with a little bit of work to the fish box. I welded up a fish box recently
and began putting it in its place in the previous inboard engine bay. I've got a couple simple doors on the transom on both port and starboard side, giving me access to the drain points and the rear cranking battery. (not yet installed)
This week I hope to tie in the last of the metal work so I can get the windows installed.
I decided to go with the two side windows by AJR Windows, in Port Coquitlam. Saw these guys at both boat shows, as well as their windows on nearly every alloy boat at the show. I opted for a framed, forward sliding window on the driver side, and a framed fixed window on the passenger side. The windshield will remain laminated safety glass with the rubber mounting.
Big hand to NU DIMENSIONS in Delta as well. They've continued to be quite helpful in finding time to get my small projects on the cutter. Their work really adds a nice touch to a rough boat. Thanks guys!!
More updates to follow in the coming week. Still trying for an early April launch.
Cheers
kanuckle head
Well-Known Member
Coming along real sweet Nick, whens the sea trial party happening??
burnsy22
Well-Known Member
Did you find or buy power yet?
Scroll down a few pictures and you will find the answer =).... http://www.sportfishingbc.com/forum/showthread.php?22318-Seattle-boat-show-2013
Finished Business
Well-Known Member
Still undecided on what to do about the kicker. I am leaning towards building it a bracket to bring it close to where the main is so I can have tie rod steering between the two. If it stays in the pocket I will have to have some sort of cable steering setup which wouldn't be the worst thing either.
Benefit to having the kicker on a bracket would be that I can sheet the face of the transom pocket, and it would make a fantastic tuna slurry bucket for bleeding them out.
Regarding power, ah-yup, I dove in head first and got a screaming deal on a ETEC 250 HO (275hp).
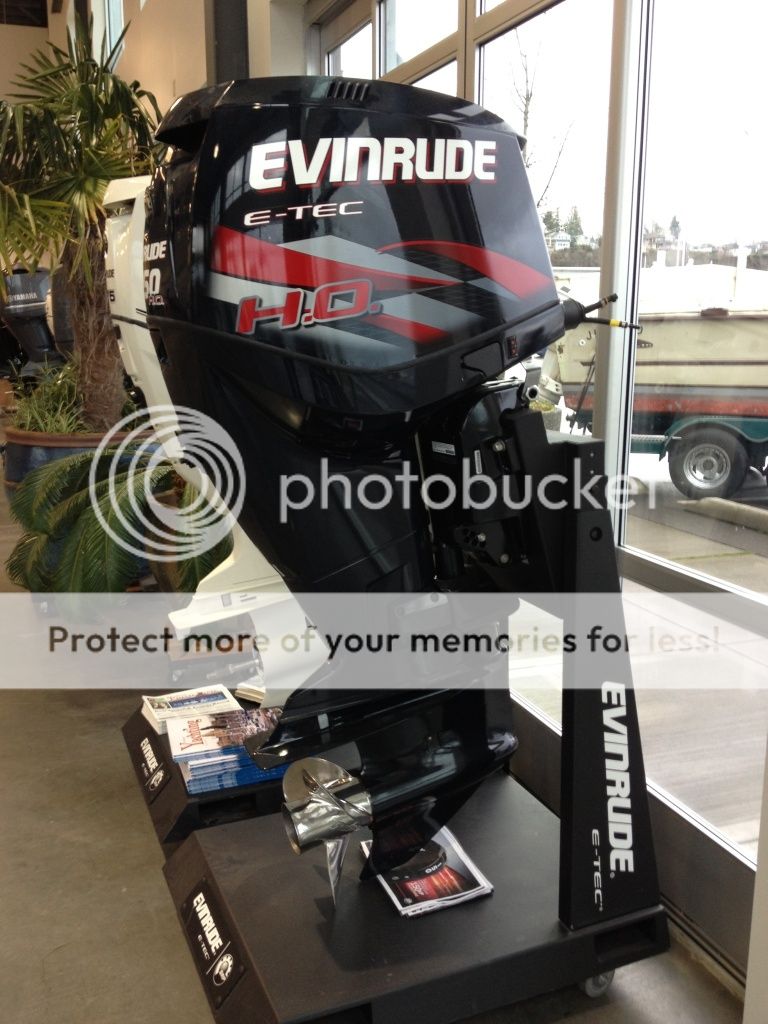
The engine is still at the dealer down south but now that the pod is drilled and ready for powder coating, I can start thinking about transporting it north. I didn't want to bring the motor up right away because as soon as it leaves the dealer, the warranty starts. I didn't want to burn a month or two of warranty while I finished the build.
...thanks for the added link Burnsy, t'was a good show!
Benefit to having the kicker on a bracket would be that I can sheet the face of the transom pocket, and it would make a fantastic tuna slurry bucket for bleeding them out.
Regarding power, ah-yup, I dove in head first and got a screaming deal on a ETEC 250 HO (275hp).
The engine is still at the dealer down south but now that the pod is drilled and ready for powder coating, I can start thinking about transporting it north. I didn't want to bring the motor up right away because as soon as it leaves the dealer, the warranty starts. I didn't want to burn a month or two of warranty while I finished the build.
...thanks for the added link Burnsy, t'was a good show!
trendsetter
Active Member
The pod looks great FB. It's going to look even better when it's powder coated.
Are you planning any paint job for the other areas of the hull or will you be leaving it as it?
Are you planning any paint job for the other areas of the hull or will you be leaving it as it?
trendsetter
Active Member
popped by FB shop today, he was nice enough to weld up my pulpit...while in the shop gave him a hand mocking the pod to prepair for permanent installation, reused what existing holes possible and drilled the necessary remaining holes...thought I would share some pics
Hey FB, where are you going to run all the cables for the outboard? (battery, throttle, shifter, engine, trim, fuel, steering). Are you going to drill an access hole through the transom on the starboard side? If that's what you are doing you will want to wait until you get the motor so you can set it at the best position.
I would think you'd need three (1 for fuel, 1 for steering and 1 for the rest).
EDIT: Scratch that, looks like the fuel will come through the same as the engine controls and cables. So 2 holes. Also, it looks like the plumbing and everything is already there for the kicker.
Last edited by a moderator:
Finished Business
Well-Known Member
Good thoughts TS.
I was thinking it last night about just routing through the starboard side, not cutting a hole through the pod. But a hole through the pod is no big deal, even after powdercoating. I would think going through the pod would be the most direct route, but I also thought it would be nice to not have all the cables through the pod because then there is less obstructions if I need to step on the pod for say, a wizz.
You'll have to pop by soon to make sure I'm not forgetting something. I've covered so many projects on this boat that it is a little overwhelming keeping tabs on everything that needs to be done. Every project is different and requires me to think twice each time. Today for example I built the supports for underneath the engine bay cover. Cut out and drilled the channeling that will act as the rigid support for the pod on the inside of the transom. And welded the 2 forward seat post plates to the floor, so now I have seats which is pretty cool!!
Tried to continue on with some more structural and paneling at the transom but the brain went to mush after the previous tasks so I need to take a breather before moving on tomorrow....plus I think I'm running out of argon and wire so I will need to re-up those...
I've seen a few different style of through-hulls for wiring, steering, and fuel...the rubber style grommets...gotta see whats available and whats the best option.
Finished Business
Well-Known Member
Some more progress...
built the framing and welded the rear panels and corner pieces on the cabin. Also added gunnels down either side. It looks like I will have a full 8 feet of deck space when I'm running just two seats. Lots of room to dance! I also mocked up the GC2 house batteries I will be running under the walkaround. Fits nicely with room to spare!
more to follow...


Cheers!
built the framing and welded the rear panels and corner pieces on the cabin. Also added gunnels down either side. It looks like I will have a full 8 feet of deck space when I'm running just two seats. Lots of room to dance! I also mocked up the GC2 house batteries I will be running under the walkaround. Fits nicely with room to spare!
more to follow...
Cheers!
Finished Business
Well-Known Member
Few more updates after another day behind the gun..
I added in some triangle pieces to act as steps to get up onto the walk around and kind of tie everything together.

I also built the sliding track system for the access panels to get under the walk around, for general storage (port) and the house batteries (starboard)


I still have to build some arm rests, some H.S.H's (holy sh*t handles") ), foot rests on the cabin wall and seat posts, and make the additions for the rear facing cabin chairs.
), foot rests on the cabin wall and seat posts, and make the additions for the rear facing cabin chairs.
Onto Da back of da boat...
Finished framing and welding into place the rear transom panels (sans fish hold cover) The port and starboard access panels....one of which will house my cranking battery and the other be available for larger item covered storage.

Building off an idea me and CZ were shooting around, I went ahead and hinged the reinforced center section of the transom and added a drop down leg to quickly convert into an excellent 30"x30" cleaning table, or a nice place to have lunch with the guys or appy's with the miss. I still plan to add a storage shelf to the panel, but it will tuck away nicely when the table is out into the rear storage shelf on the transom itself. I will detail with some pics of the shelf tomorrow. I also plan to add some flush mount drawer and tackle hatches to the multi use panel/table.


Heres a shot of the rear transom shelf which I sheeted with checker. It will make for good cannonball, rod, or what-have-you storage. There is a hinged cushion (the black thing) that folds over to cover the shelf from the elements.

Lastly, here's a shot of some gusseting I added under the gunnels to give them support. they were fairly strong as is, (3/16" material formed with a 90 bend and an extrusion underneath for support, as well as being welded at either end of the boat) but I wanted just a little more for when my shorter crew members need a step to get out of my 35" sides.

Still have to build a few handles for all these access panels, add a few flush mount rod holders at the transom and along the sides. I've got some heavy C-Channel cut that I am going to use to mount my Scotty's to. A few Scotty rod holder bases here and there, carpeting for the sides. Silicone some seams add steering, power and water and I should be getting it bloody in no time.
Sorry if I get wordy, I use this thread to refer back to at times like taking notes...
Cheers,
thanks for reading.
I added in some triangle pieces to act as steps to get up onto the walk around and kind of tie everything together.
I also built the sliding track system for the access panels to get under the walk around, for general storage (port) and the house batteries (starboard)
I still have to build some arm rests, some H.S.H's (holy sh*t handles
), foot rests on the cabin wall and seat posts, and make the additions for the rear facing cabin chairs. Onto Da back of da boat...
Finished framing and welding into place the rear transom panels (sans fish hold cover) The port and starboard access panels....one of which will house my cranking battery and the other be available for larger item covered storage.
Building off an idea me and CZ were shooting around, I went ahead and hinged the reinforced center section of the transom and added a drop down leg to quickly convert into an excellent 30"x30" cleaning table, or a nice place to have lunch with the guys or appy's with the miss. I still plan to add a storage shelf to the panel, but it will tuck away nicely when the table is out into the rear storage shelf on the transom itself. I will detail with some pics of the shelf tomorrow. I also plan to add some flush mount drawer and tackle hatches to the multi use panel/table.
Heres a shot of the rear transom shelf which I sheeted with checker. It will make for good cannonball, rod, or what-have-you storage. There is a hinged cushion (the black thing) that folds over to cover the shelf from the elements.
Lastly, here's a shot of some gusseting I added under the gunnels to give them support. they were fairly strong as is, (3/16" material formed with a 90 bend and an extrusion underneath for support, as well as being welded at either end of the boat) but I wanted just a little more for when my shorter crew members need a step to get out of my 35" sides.
Still have to build a few handles for all these access panels, add a few flush mount rod holders at the transom and along the sides. I've got some heavy C-Channel cut that I am going to use to mount my Scotty's to. A few Scotty rod holder bases here and there, carpeting for the sides. Silicone some seams add steering, power and water and I should be getting it bloody in no time.
Sorry if I get wordy, I use this thread to refer back to at times like taking notes...
Cheers,
thanks for reading.
ComfortZone
Member
Its coming together!!, that table is awesome, sliding doors for the side access panels are a great idea also...lookin good!
one question as it may apply to something on my boat...welding on those gunnel gussets, what does the paint look like on the outside of the hull?? did it burn or discolor it??
one question as it may apply to something on my boat...welding on those gunnel gussets, what does the paint look like on the outside of the hull?? did it burn or discolor it??
Finished Business
Well-Known Member
what does the paint look like on the outside of the hull?? did it burn or discolor it??
My sides are only .090" so they are pretty thin. I could have been a little nicer to it (I might have burned a small holed through that I will have to weld from the other side to close it up good lol) but ya, the paint discolored (burnt) and with a wipe of my glove it removed a 2" square section of paint. Doesn't bother me any as it will be looking pretty rough for a season and then I may address the paint but for now, she's scarred! lol
Similar threads
- Replies
- 72
- Views
- 16K
- Replies
- 12
- Views
- 5K
- Replies
- 9
- Views
- 2K