Campion explorer fuel tank

CatchAll

Member
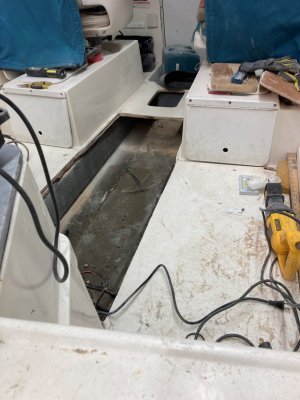
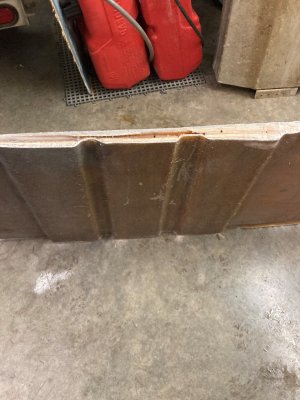
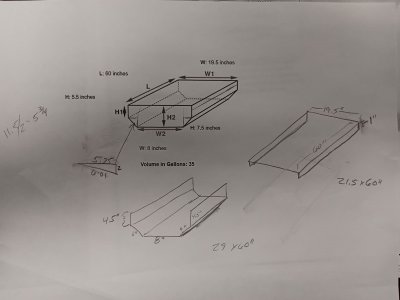
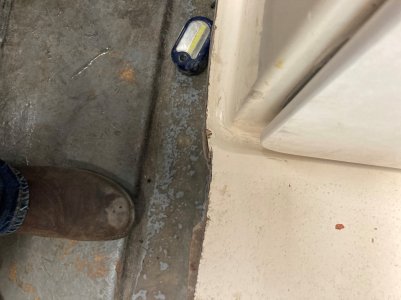
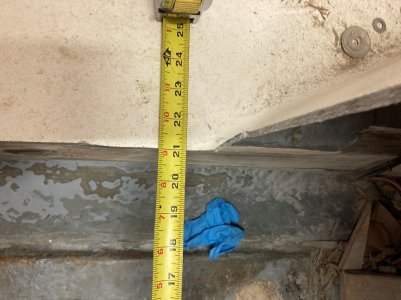
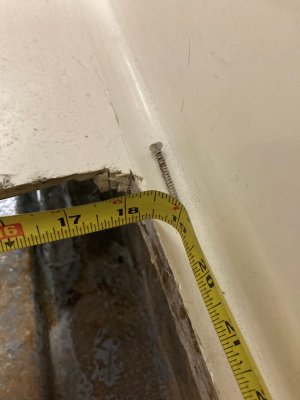
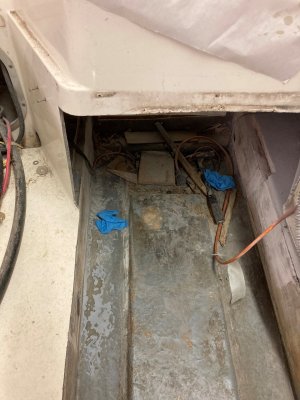
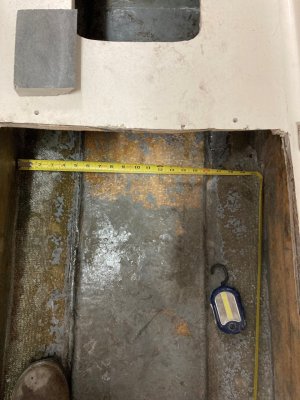
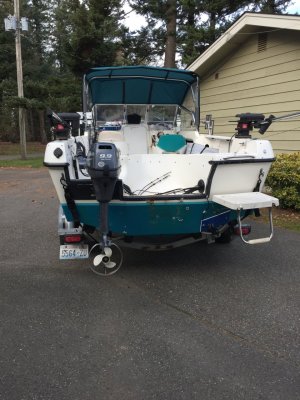
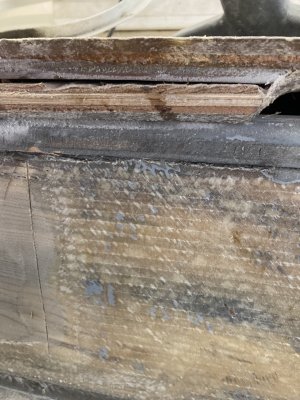
Who has done a fuel tank replacement on an older 185 or 542 explorer? Any advice or tips? Pictures of the process? There’s no access, so it’s either cut the floor or pull the cap. I have a mid 1990s explorer 185 and it looks like I’ll be doing a tank asap. Current plan is to cut the floor and the front of the splash well and pull it out.
 
So I put an inspection hole in the deck in front of the tank and took a look around. It looks like all the fuel leaked out the back side, but it’s hard to get my head down there to see exactly where the leak is at. 36 gallon tank went completely dry, so it clearly isn’t a bad hose.

The tank is 19.5” wide, there’s 22” between the stingers, and the font of the tank is below where the seat boxes are about 21” wide. It can come up through the deck but I will have to cut the front of the splashwell a bit. I’m uncertain about the best way to reinstall the deck. The deck floats about 1/2” above the stringers
Nasty. Following as I have the same boat without your issues.
 
is it not possible to tilt the tank at an angle and slide it out so you don’t have to cut the splash well area out?
 
is it not possible to tilt the tank at an angle and slide it out so you don’t have to cut the splash well area out?
I might try that first, but the filler neck sticks up above deck height under the splash well. I’ll take some pics.
 
Hello, I also need to do a tank in a 185 Explorer, did you get to it yet? Do you have any pictures? Also I don't know the size of the tank. Purchasing the boat and don't have it yet, but am told the tank leaks. Thanks for any help!
 
Hello, I also need to do a tank in a 185 Explorer, did you get to it yet? Do you have any pictures? Also I don't know the size of the tank. Purchasing the boat and don't have it yet, but am told the tank leaks. Thanks for any help!
and the boat is a 1995
 
I have started on it. I cut the deck out, removed the tank, and I had a new tank built. I haven't put it back together yet because I'm doing the transom at the same time. Here's a pic of the hole in the deck and a cross section of the deck itself. I can take some more pictures or measurements for you. What would you like to see? My tank was 36 gallons. There's a good sized cavity in front of the tank that I'm turning into storage (hence the hatch cutout). I thought about making the tank longer for more capacity, or shifting it forward for better balance, but decided that I wanted some in-floor storage. That project is also taking some time because I had to bridge the gap from the stringers to the deck and make a couple of bulkheads. I'll also shoot you a direct message.
 

Attachments

  • boat pic.jpg
    boat pic.jpg
    178.7 KB · Views: 181
  • Deck pic.jpg
    Deck pic.jpg
    212.6 KB · Views: 173
If your tank is the same as mine, the picture shows the approximate dimensions. I ended up pulling my tank and bringing it to a local builder to have them duplicate it. I had them build it out of heavier gauge aluminum. There are angle brackets at the front and back so the tank is screwed to the lower deck. Campion threw a few thin pieces of rubber material under the tank, but not enough to keep the tank from rubbing on deck below it because they didn't put anything under the angle brackets. The combination of the tank in a saltwater bilge and rubbing on a rough surface finally did it in. I got some neoprene strips and used 3M 5200 to adhere and seal them to the bottom of the tank. I'm also spacing the angle brackets off the deck. The thicker tank and a bit of air gap should help it last. I understand that some people use coal tar epoxy to completely seal their tank before install. I don't think that will be necessary.
 

Attachments

  • 11.jpg
    11.jpg
    138.7 KB · Views: 75
Here are a few more pictures that might be useful. I made my cut 21" wide in the back, but had to narrow up between the seat boxes. If I was doing it again I might have made the cut in the back deck over the stringer centerline. The deck floats above the stringers except for the three cross members that you see in my earlier post. If you cut directly over the stringers up to the seat boxes the back section will rest right back in place on the stringers when you reinstall. For the portion between the seat boxes I am going to epoxy and screw some strips that it can rest on while I glass it back in. Making the cuts in a pain in the... You can use a skill saw for part of the job, but there isn't much space between the seats to work. I ended using a combination of a skill saw, jig saw, sawzall, and the best of all a 4.5" blade on an angle grinder. Look up "circular saw blade for angle grinder" on amazon. With that blade you can get the cut between the seat boxes where you need it, but its a scary tool to use. I cut the splashwell area a little wider so that my vertical cuts are on a flat surface. That should make it easier to fiberglass it back in.
 

Attachments

  • 10.jpg
    10.jpg
    261.3 KB · Views: 113
  • 9.jpg
    9.jpg
    321.3 KB · Views: 106
  • 8.jpg
    8.jpg
    146.1 KB · Views: 107
  • 4.jpg
    4.jpg
    204.9 KB · Views: 112
  • 1.jpg
    1.jpg
    249.3 KB · Views: 108
On another note, when you get the boat check out your motor height. If you look closely at this picture you will see that the there is a "step" up and back from the bottom of the boat/drain to the bottom of the transom. Some campions were built like this and some were not. From the top of the transom to the bottom of the transom is only 17". Even with a 20" shaft motor mounted as high as possible, the anti ventilation plate is too deep. I had to put my motor on a jackplate and crank it up. If you go for a ride and can't get it to stop porpoising, you see excessive spray from the motor area, and fuel economy isn't very good, then you might have the same problem.
 

Attachments

  • transom.jpg
    transom.jpg
    292.2 KB · Views: 118
Thank you for all that info, mine does not have that step at the drain in the back. I guess I will start cutting!
 
Same boat. Do you know if the floatation was completely protected? I had an unfortunate situation where water sat covering the floor for a couple months. Am I F@#ked? total flotation removal and reconstruction? I really cant tell how much ply is used by your pics.
 
Same boat. Do you know if the floatation was completely protected? I had an unfortunate situation where water sat covering the floor for a couple months. Am I F@#ked? total flotation removal and reconstruction? I really cant tell how much ply is used by your pics.
You need to get that floor up and dry out under there before your stringers and transom rot
 
The deck floats about 1” above the stringers except in a few spots where there are crossmembers. If your bilge filled all the up above the stringers then to water will overflow to the side with the foam. I would get a 5 1/2 hole saw and a couple of deck plates and cut in a couple of plates through the deck below the splashwell. Like where your battery is installed. Put the plates as close to the center of the boat as possible without hitting the stringers. If you stick your head in through those back hatches you will see a section of deck that goes under your main deck. Those sections are only about two feet long. If water covered that area then it also covered your foam.
 
The deck is 1/2” plywood with three 1/2” plywood crossmembers. Here’s a picture of the deck, a crossmember, and a spacer that the factory installed so that the crossmember rests on the top of the stringer.
 

Attachments

  • IMG_5906.jpeg
    IMG_5906.jpeg
    259.6 KB · Views: 83
how much to cost you to build a new fuel tank?
and how much is the total cost of this repair(material} and about how many hours do you take?
thanks
 
Do you have any updates on this project. How did it turn out?
Did you do the glassing yourself and where did you get your tank from?

I am looking at getting my tank replaced. I have a small leak at the top.
 
Back
Top