Yamaha 9.9 engine trouble - looking for advice

That's a pretty good video. Question, did you pull out the stem underneath the main jet when you had it apart?
Yes, I pulled out the main jet and the nozzle - sprayed out both with carb cleaner, blew out with compressed air and visually inspected (could see light through the holes). I didn't use a wire though to clean out the holes - which I probably will do this time around.

Looking at the parts diagram, I saw that there is an internal filter inside the carb bowl (part #24 in the diagram). This filter wasn't included in the rebuild kit, and I didn't blow this out or try to flush it (I wasn't even sure what it was at the time).

Anyway, ruling out the fuel pump, I suspect that the mistake is on my end. I just need to go through it one more time - slower, more carefully, more thoroughly. Time to 'invest' in one of those small ultrasonic parts washers.

The rebuild kit was so haphazard - would have been nice to have list of 'while you are in there' parts to replace. The motor is up in the okanagan, so every time I fail I've got to wait for the next trip up to order new parts and try again.
 
Last edited:
I had a similar situation. Bought a near new but sitting for 10 years Yam 9.9, went through the carb and had similar run problems until I was able to get some run time on it.

My secret method was while accelerating to put my hand over the intake to flood the engine and draw loads of fresh fuel through all the ports and passages in the carburetor. A moment or two at full throttle, then back to idle then accelerate give it some hand choke and so on. It just needed a bit of help on the first trip and has been working great since.
I love hearing tricks like this. Even though it was running like crap, I tried to run it around as much as possible to get fuel through it, and try to knock something loose. The trick with these older motors is to use them as much as possible, and always run them completely out of gas when you store for anything more than a few days.

I got this motor for $50. I'm into it now for $300 total, including a carb rebuild kit, new accelerator pump diaphragm, water pump rebuild, new T-stat, and new oil filter element (these have the weirdest oil filters). I figure if I had bought an equivalent 'runner' off craigslist I'd be around $1300-1500, and would have needed to do a lot of the above maintenance anyway - and where's the fun in that!
 
only if your time has zero value. i estimate i blew around $7K on small outboards and im totally done with them.
I'm not looking to charge out my time at $120/hr when I'm on vacation at the cabin - I'm sitting around drinking a beer with a buddy and messing around with an old motor in the garage, this is pure fun.

There are few things in life more satisfying than fixing something.
 
Yes, I pulled out the main jet and the nozzle - sprayed out both with carb cleaner, blew out with compressed air and visually inspected (could see light through the holes). I didn't use a wire though to clean out the holes - which I probably will do this time around.

Looking at the parts diagram, I saw that there is an internal filter inside the carb bowl (part #24 in the diagram). This filter wasn't included in the rebuild kit, and I didn't blow this out or try to flush it (I wasn't even sure what it was at the time).

Anyway, ruling out the fuel pump, I suspect that the mistake is on my end. I just need to go through it one more time - slower, more carefully, more thoroughly. Time to 'invest' in one of those small ultrasonic parts washers.

The rebuild kit was so haphazard - would have been nice to have list of 'while you are in there' parts to replace. The motor is up in the okanagan, so every time I fail I've got to wait for the next trip up to order new parts and try again.

I had same thing. If it dies at low throttle it's the low idler jet. I had to use a small wire to clear mine all the time.

Also make sure those no crap in the carb bowl.
 
Pay attention to Ship Happens. I had the same motor and it was the same symptoms and doing what he said solved the problem. Here you go:

You say the idle screw is covered up? Do you have a picture? In alot of cases, they put a punch cover ( aluminum or brass) overtop of that screw. It's for their EPA regulations. They can be easily knocked out or drilled out. I've had to do this a million times.

What ends up happening in this case is the engine is set from the factory so lean that once the valves set the engine will not run properly. That adjustment screw solves it everytime. That and in relation to the idle position screw.
100% - this is on my list. It has a brass cover that I'll take out.
 
So, I disassembled the carb again last night.

Here's what I did:
- Disassembled main jet & nozzles and ran a thin piece of wire through all holes, did the same for the pilot jet.

- There is also a choke valve and a starter jet in the float bowl, ran wire through this as well. The choke valve appears to be a one way valve, so I was bit more careful with this.

- The float bowl has an internal plastic filter, which I tried to remove - but it was stuck and I ended up tearing it - so new one to order. It was unclear what this filter even does, or how it is plumbed in on the fuel supply

- Checked accelerator pump diaphragm - no issues

-Brass cap for air adjustment screw removed - will adjust when carb goes back on

- When I was disassembling, I noted that the float didn't appear to be positioned correctly, and it turned out that the hinge/dowel pin had slipped out on one side. When I originally rebuilt the carb, the old dowel pin was really tough to remove, whereas the new one was almost too easy to put in (I can remove it with my fingernail rather than using needle nose pliers). This may have been the source of some issues when I was test running, but unknown. I still think the float may not be setup right. I read somewhere that when the float is fully closed, the seam on the side of the float should be perfectly parallel with the rim of the float bowl. Mine isn't - slightly cockeyed. Likewise, not sure how much the float should open? This can all be adjusted by bending the metal tabs on the float. I really wish I had a shop manual for this.

I'll take some photos tonight when I re-assemble. Ran out of time last night. Was working at the kitchen counter and the Mrs wasn't too impressed by the perfume of boat gas rising through the house...

Sounds like the pin is the press in type. Knurl one end of the pin with some side cutters or some pliers. Make it fit tight on the one end.

The little filter screen means nada. It won't make or break your install.

When you get it back together, focus on the idles stop position screw and the idle air screw that you now have access to. Tune it up in the water. Do all your fine tuning in forward gear in the water.
 
I'll give you guys the million dollar tip, and my secret weapon.

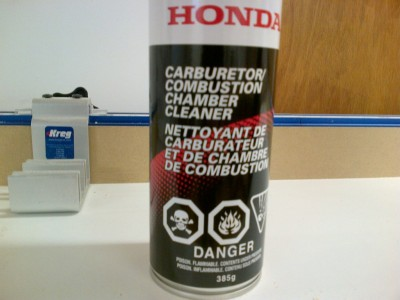
I rarely use a wire to clean jets or emulsion tubes unless the carb is extremely skanky and needs mechanical assistance. I use Honda carb cleaner. Spray it into a container (2 or 3 cans if you want to soak a whole carb) and drop all the bits and bobs in for a proper chemical cleaning.

1724900806910.png
 
Last edited:
2-3 cans!? My god.

I was looking at the MSDS for a few of these carb cleaners, and they seem to be mostly a blend of Toluene, Acetone, and Methyl Alcohol - If you are going to soak it in a tub, likely cheaper to just go to an auto parts store and buy bulk parts cleaning fluid or even a paint store and pick your solvent of choice.
 
If you want to do a really thorough job Honda cleaner is where its at. Luckily it can be used over and over until it get completely contaminated. For the 100% deluxe job the carb should be completely submerged, hence the 2-3 can option. If its not a complete rebuild 1 can into one on those ziplock plastic containers is perfect.
 
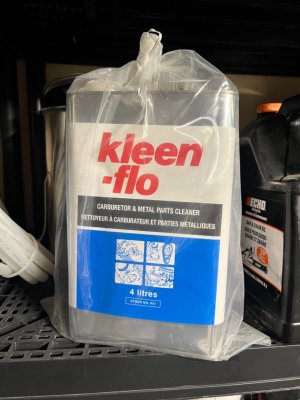
I use Kleen-Flo 651 for carbs. It’s in a sealed metal container, with an additional bag over top because it stinks so much, and they only like to put one of them on the shelf at a time, so you know it’s good lol. I tried a solo cup for the first soak and it was gone instantly. Now I have a dedicated muffin baking pan for cleaning carb parts. I think the only place I could find it was alder auto parts. The regular stores don’t carry heavy duty stuff really.

Ultrasonic cleaner will be good too for cleaning carbs.
 

Attachments

  • IMG_7376.jpeg
    IMG_7376.jpeg
    291.6 KB · Views: 7
I use Kleen-Flo 651 for carbs. It’s in a sealed metal container, with an additional bag over top because it stinks so much, and they only like to put one of them on the shelf at a time, so you know it’s good lol. I tried a solo cup for the first soak and it was gone instantly. Now I have a dedicated muffin baking pan for cleaning carb parts. I think the only place I could find it was alder auto parts. The regular stores don’t carry heavy duty stuff really.

Ultrasonic cleaner will be good too for cleaning carbs.
I had a jug of hydro seal I was using for years but ran out of recently. Would chew through 10 mil nitrile gloves like toilet paper. I don’t think you can get it anywhere now so I’ll check this stuff out
 
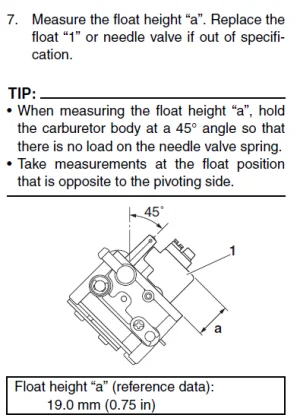
Does anyone know the float height specification for a Yamaha F9.9MSHF?

This is the information I could find:

1) This is an extract I found on HullTruth for a F9.9SMHB, different carb than I have, so likely not applicable...
1725032517803.webp

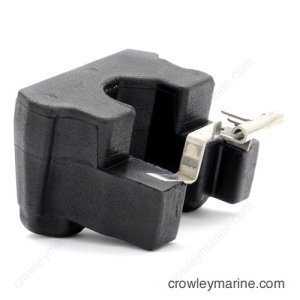
2) Alternatively, was watching a few youtube videos that show you just align the middle horizontal seam on the float with the edge of the float bowl. Here's an image of the float with seam clearly visible.

1725032732404.jpeg


Its highly possible that my fuel starvation issue is related to an improperly set float. Currently the float seam sits higher than the rim of the float bowl, which (if my understanding is correct) would mean that fuel filling the bowl to a lower level.

Lesson learned (hopefully). Always take more photos than you think you need before disassembling...
 
Last edited:
I had a jug of hydro seal I was using for years but ran out of recently. Would chew through 10 mil nitrile gloves like toilet paper. I don’t think you can get it anywhere now so I’ll check this stuff out
Just get a big ultrasonic cleaner off Vevor. It'd be Good for lots of other things too.
 
Back
Top