
You are using an out of date browser. It may not display this or other websites correctly.
You should upgrade or use an alternative browser.
You should upgrade or use an alternative browser.
1981 campion 210 discovery
- Thread starter brad fox
- Start date
![PXL_20250728_042614358[1].jpg](/data/attachments/118/118994-7a10152b7a8952404fbc4618aae51d22.jpg?hash=W3Wq8LNMXD)
![PXL_20250728_063634555[1].jpg](/data/attachments/118/118995-afa469c15138ae404012cc88a10e7e19.jpg?hash=7Um5DkaYWc)
Well after a week of camping and a bout of the stomach flue, Im back at it. trying to wrap the major rebuild portion of this boat before the fall rains hit.
I finished the main stringers laminated in with 3 layers of 1708, using waxed resin, then got bulkheads shaped up and am tabbing them in currently.
Then installed some conduit for wiring to the batteries, and drilled some drain holes through the stringers where the storage compartments will be.
I also built some bunks for the fuel tank mount bedded them in and tabbed them into the stringers.
![PXL_20250810_233123707[1].jpg](https://sportfishingbc.com/data/attachments/119/119552-03105ce58a756018208b85a20cc82849.jpg?hash=TNFVQ58SO8 "PXL_20250810_233123707[1].jpg")
Next step is to tab in the bulk head completely, install the gas tank, and make some more bulkheads to form some under deck storage compartments
I finished the main stringers laminated in with 3 layers of 1708, using waxed resin, then got bulkheads shaped up and am tabbing them in currently.
Then installed some conduit for wiring to the batteries, and drilled some drain holes through the stringers where the storage compartments will be.
I also built some bunks for the fuel tank mount bedded them in and tabbed them into the stringers.
Next step is to tab in the bulk head completely, install the gas tank, and make some more bulkheads to form some under deck storage compartments
Attachments
![PXL_20250810_233134317[1].jpg](/data/attachments/119/119551-1415d5b8fc552ca94a138285e398e044.jpg?hash=5wutbrwubz)
![PXL_20250813_132848991[1].jpg](/data/attachments/119/119624-fdb53774fd7b9777e87fd3af504d0b3a.jpg?hash=MA7sy2uVV1)
Well foam is done. Took 3@ 2 gallon kits. Not sure pouring it open was much better. If it was plywood it would probably be better to deck first. But with the go board not being structural probably best I've poured it open and am cutting it down. Will use a can of big gap filler when I go to lay the deck in to fill any voids.

So time for an update, I've been after it for a couple days when I got a massive headache and the spins Sunday... Looks like I gave myself styrene poisoning... Been recovering this week... Should have started with fresh carbon filters on my mask...
I got the first two layers of mat and roving down on the rear floor section. Next to finish laying the front down and finish glassing it all in then I begin on the fish box and get the gunnels back on and tabbed back together. And the gunnel braces in place too.
Another week or two and I will be reinstalling all the hardware and wiring. Then installing the motor and battery. And finally getting it into he water for a rundown
Attachments
So getting back into this.
Replacing the gunnels and tying them back together, started by adhering a backer to the under side of the gunnels, some leftover coosa scraps, this helped me align the seams and bulked up the rather thin sides of the gunnel.
Not a lot of meat to work with but got one good layer of 1708 in the seams with a topper of 1.5oz mat. All out in with vinyl ester for that better adhesion which of course it will no doubt require.
Attachments
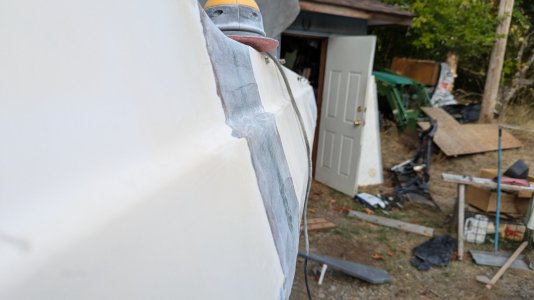
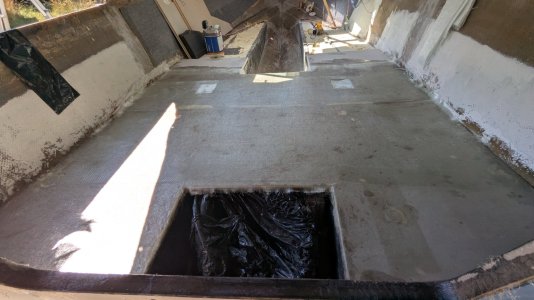
So in the past few weeks I've got the floor glassed in, gel coated and the step laminated in. Added a little silica sand to the white gelcoat for grip.
Put the bulkheads back in. Also go a good start on the head liner install will finish after wiring is done. tossed the cabinets back in that came with it. my plan is to redo the cabin next spring when I've paid off the CC.
Put the bulkheads back in. Also go a good start on the head liner install will finish after wiring is done. tossed the cabinets back in that came with it. my plan is to redo the cabin next spring when I've paid off the CC.
Attachments
![PXL_20250916_043408686[1].jpg](/data/attachments/121/121184-cc0575c1fa64520755f4592f166a7ef5.jpg?hash=rOc01utlpw)
![PXL_20250916_051321954[1].jpg](/data/attachments/121/121183-d5f271fa228d8f8e0e6ce346c8f9016c.jpg?hash=Zm7tR_E5uL)
![PXL_20250916_051335761[1].jpg](/data/attachments/121/121182-6735ad4f5fee14f18532649d6685fccc.jpg?hash=xsUxUyZaPv)
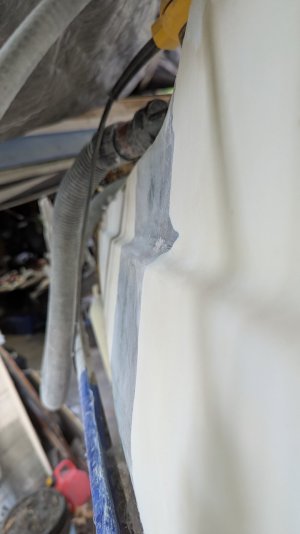
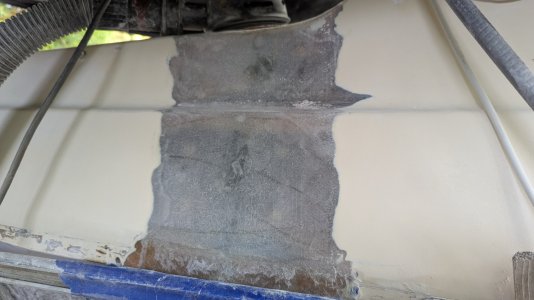
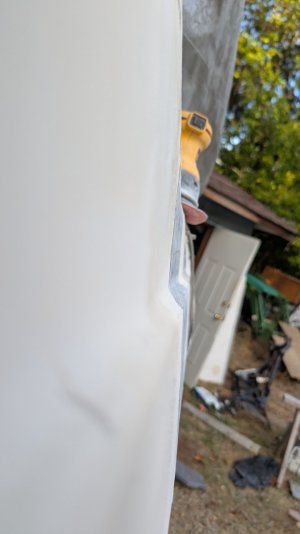
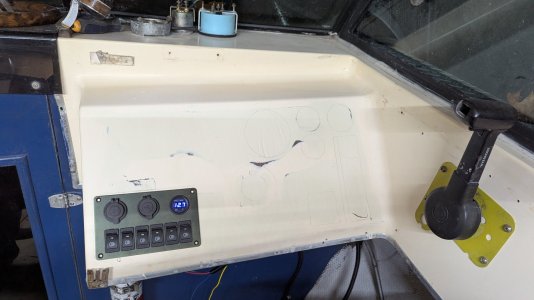
Fixing up the helm. Chiseled out the old ply off the back. Set the new ply on with a layer of CSM and began layering in fiberglass to build up thickness in the old cut outs. I will finish with new gel coat over everything sanded and faired out to 800 grit.
Attachments

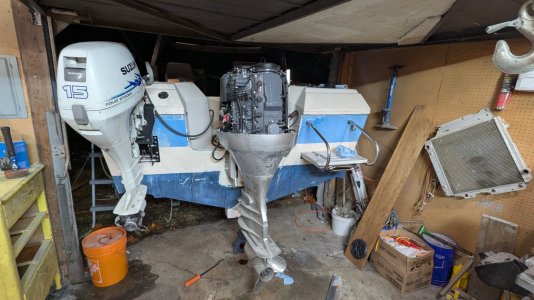
So moving right along. Have gor the motor mounted the fuel system hooked up with a 3 way ball valve so I can send fuel from the main tank to either the main or the kicker.
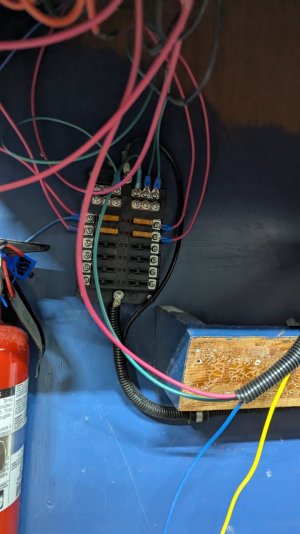
Mounted up the kicker bracket, and the swim platform. Bilge pumps and a good start on the electrical.
Mounted up the kicker bracket, and the swim platform. Bilge pumps and a good start on the electrical.
Attachments
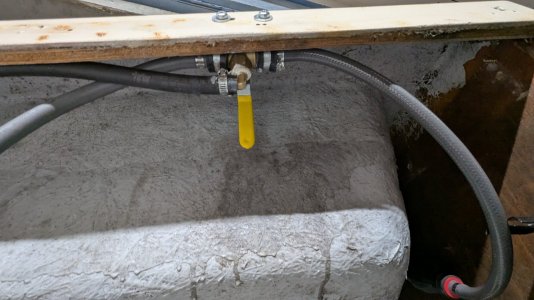


I am going to do something like that to prevent this in the future, it's just a ball valve, I changed the handle when I mounted it, so now it is backwards to what I had originally observed.Those fuel selector valves are not intuitive to use. I drafted a little diagram that shows the correct valve positions for bow and stern tank sources, printed and laminated, mounted beside the valve.
Did this so I can run both motors of the main tank.

willydw
Active Member
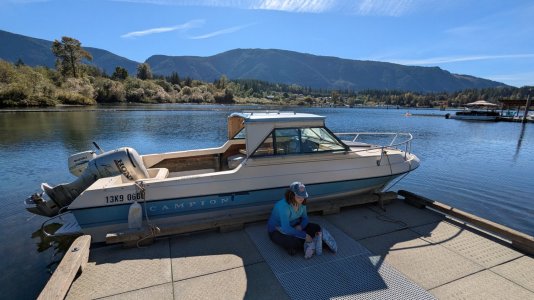
Push a red wd40 straw up the tell tale. Usually salt crystals plugging it up.Actually got to run it today.
Was a great time. Water was absolutely glass for much of the morning. Cruised for a couple hrs. Tell tale got plugged up. No over heating at all though.
On to outfitting for some fishing.
sly_karma
Crew Member
Figure out how to display water pressure and engine temp on a screen or a gauge, methods will vary between different power brands and models. The telltale doesnt tell very much. An engine with a mid-rpm overheating problem can still show a stream from the pisser, and a perfectly fine cooling system might show just a dribble or no stream at all on startup, especially on earmuffs. Get the data.
Got it flowing with the flush and a pipe cleaner at home. Flowing great nowPush a red wd40 straw up the tell tale. Usually salt crystals plugging it up.
I would like to get a temp gauge, the simrad MFD I am buying is nema 2000 compatible, but the Honda's didn't begin to use nema till 2010 from what I've read. There aren't any obvious gauge hookups for temp but I do have a wiring schematic for this motor so I will look and see if temp gauges are available for them still.Figure out how to display water pressure and engine temp on a screen or a gauge, methods will vary between different power brands and models. The telltale doesnt tell very much. An engine with a mid-rpm overheating problem can still show a stream from the pisser, and a perfectly fine cooling system might show just a dribble or no stream at all on startup, especially on earmuffs. Get the data.
sly_karma
Crew Member
There is probably a blank plug or two already present in your engine block that can be used to read water pressure. Not that hard to find generic transducers for pressure, hunt around for items with appropriate psi range - link to example below. Purchase an NMEA connector and use a downloaded pinout diagram to connect it to transducer. I did this with my ETEC instead of buying the official Evinrude kit at four or five times the price. Has worked flawlessly for five years.
You can do something similar with temp sender. In this case, you already possess the required sensor, you just have to tap into its signal while still maintaining that signal into the outboard's wiring harness and control modules. Remember NMEA is just a simple serial protocol, completely analog. The signal voltage from the temp sender can be split to a second circuit, in this case your NMEA network.
There are lots of other transducers available compatible with NMEA. A fuel flow sensor can be installed in the fuel line to the outboard; I did this successfully with old analog two stroke motors before I repowered. There are also optical fluid level sensors if you want to monitor fuel tank and show it on screen. All of this can be done without the outboard maker providing a dedicated NMEA 2000 output.
Pressure Transducer, 1/8NPT Thread Stainless Steel Pressure Transducer Sender Sensor 30/100 /150/200/300/500 psi for Oil Fuel Air Water(30psi) : Amazon.ca: Industrial & Scientific
Pressure Transducer, 1/8NPT Thread Stainless Steel Pressure Transducer Sender Sensor 30/100 /150/200/300/500 psi for Oil Fuel Air Water(30psi) : Amazon.ca: Industrial & Scientific
a.co
coholips
Active Member
Looking great....I'm a sucker for all things hardtopGot itnot the water today. Floats real nice. Couldn't figure out why it wasn't getting fuel, my selector was backwards to how I thought it was. All-well next time. Motor fired right up on the fuel
in it's lines.

Similar threads
- Replies
- 10
- Views
- 940
- Replies
- 7
- Views
- 847
- Replies
- 6
- Views
- 912
- Replies
- 2
- Views
- 319
- Replies
- 15
- Views
- 2K