Al Fuel Tank Replacement

Rockfish

Well-Known Member
Looks like it is time to replace the fuel tank in our 1983 Model 2200 Glasply Express Cruiser. The Al tank is approaching or at end of life and is factory original. Dimensions are 72inches x 22 inches and for depth has a v-shaped bottom that is 12 inches in the center and 10.5 inches on the sides. There are 5 holes/2 outlets/filler/vent/sender on the top of the tank.

Currently we are looking for someone to fabricate and weld us up a replacement tank to DOT specifications, pressure testing etc. and have a line on a couple of options, as so far there does not seem to be any off the shelf options in either plastic or Al. The weight of this keel line tank I believe adds considerable ballast and contributes to boat stability so we don’t want to go smaller and the location of the inlets/outlets is also important to match up to the design of the boat.

We are looking at a couple of options and if anyone knows of anyone else who would be good at building a tank in the south VI area or has a line on an off the shelf option I would appreciate suggestions.

The good news is that there is complete access to the tank and its mounts with the removal of the full length glassed screwed down wood cover. The bad news is that the filler and vent hose replacement looks like it will be a pain. It may be necessary to cut an access port in the deck into a chamber to route the new filler hose etc.

The tank is currently siting on a pad of what one assumes is fuel resistant cushioning material of some sort and rests on shallow fiberglass ribs attached/built into the inside of the glass hull. Anyone know what this cushioning material is and where you can get it, assuming it is necessary to replace it?

Basically there are two jobs here, the building of the tank and the removal and replacement of the tank and installation of new hoses for the filler and the vent hose. The outlet hoses/clamps have already been replaced as has the filler cap assembly.

The issue is how much can be done with the help of my more skilled fishing buddies and if there is someone in the Sooke area with good shipwright skills who could come to the boat which is on land storage and work on it at reasonable/fair cost for both of us.

This is a first for us, so any advice/suggestions, recommendations would be appreciated.

Step one, siphon out the fuel.
 
Last edited:
If you plan on siphoning through the primer bulb and hose, make sure the fitting on top of the tank is not an anti siphoning valve.
 
Thanks Civano. No valve on the tank that I know of, but if we siphon that way we will have to remember to make sure the emergency fuel line cut off lever valves are open.
 
I bought 25' of hose and a primer bulb from princess auto. Siphoned through one of my Raycor filters and into Jerry cans. Not fast, but cheap.
 
Thanks very much, I appreciate all the help/advice I can get on this project. As a matter of fact I have read that one and quite a few others as I have been doing my due diligence.

Here is couple of other articles people may find interesting related to the tank project.

http://www.floridainshoreangler.com...plastic-vs-aluminium-the-pros-and-cons-debate

http://www.thehulltruth.com/boating-forum/634376-padding-fuel-tank.html

So far all we have got done is removing most of the gas. Gas removal Plan C finally worked which was to hook a fuel line direct to one of the tank outlets and then out the transom hole for the motor cables etc. and down to portable gas cans Put a squeeze bulb and shut off valve on the end. Unfortunately the squeeze bulb was useless so ended up sucking out the air in the hose by mouth to get it started. Yea I know, not good for you – my bad. Took most of the day and at the end we were reeking with gas and looking forward to the shower.

Step two, I am going out with a buddy to have a look at the tank and design a handle system he is going to build so we can install it on top of the tank to lift it out. Thinking of gluing it on so four of us have something to grab so that we can pull it straight up out of the tank well as there is little clearance on all four sides and no way to get straps under it. If that does not work we may end up cutting out the small bulkhead between the tank well and the bilge area where the inboard used to be to get the tank out but hoping the handle system works.

Also have to work out how to get the tanks mounts undone. It would be nice if they were attached with screws or bolts but no, - looks like the manufacturer had to attached them with large rivets.

Looks like Trotac has the neoprene fuel tank padding material that is fuel resistant and does not absorb water.

I was talking to a guy who advised that about 20 years ago he had a guy out in Sidney make him up plastic diesel and water tanks for his sail boat. Apparently he welded plastic to make up plastic tanks rather than use molds. Don’t know anything about this method or if it is a good idea, or who this guy/business is and if they are still around. Anyone know anything about it? Also don’t know if DOT approves such a method for building marine fuel tanks.

I suspect most likely we will be going with custom built Aluminum. If there was a molded plastic tank the correct size and configuration I think I would go with it but that seems unlikely.
 
Last edited:
I would go plastic if you can make it work at a reasonable price. Welded plastic should be like welded metal: a good weld is stronger than either side.

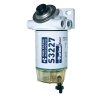
As a related item, I just added this fuel filter which has built in primer bulb: either a backup or in my case it's more accessible than usual bulb. So far so good. Also it was recommended to use straight fittings and put gradual bends in the hoses to reduce pressure drop. A 90 degree fitting adds a good pressure drop and if you aren't cramped for space.. A final detail is I angled the filter about 15 degrees so the drain is at very bottom and it's easier to see the slightest bit of water in the sight glass..

Diesel-Fuel-Filter-Spin-On_490R-RAC-01_1000x1000_zm.jpg
 
So far all we have got done is removing most of the gas. Gas removal Plan C finally worked which was to hook a fuel line direct to one of the tank outlets and then out the transom hole for the motor cables etc. and down to portable gas cans Put a squeeze bulb and shut off valve on the end. Unfortunately the squeeze bulb was useless so ended up sucking out the air in the hose by mouth to get it started. Yea I know, not good for you – my bad. Took most of the day and at the end we were reeking with gas and looking forward to the shower.

Did you point the bulb up? I just learned that there is a correct way to "pump your bulb" and it is vertical with arrow pointing up. I just got a 25hp going after a year and no fuel was pumping after 5 pumps until I remembered to orient the bulb correctly: 2 pumps and it was solid.

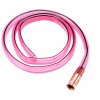
The copper jiggler pump is my choice for moving gas from can to tank, should work for other way too.

http://m.harborfreight.com/self-priming-copper-jiggler-pump-47334.htmlimage_16976.jpg
 
Thanks. Yes we know how to use a squeeze bulb correctly.

We pulled the tank today and did use a short hose and a squeeze bulb to spray out the last liter of gas with the tank raised up on one end.

The old tank is now with the builder to be measured and cloned.

So that leaves the Vent and Filler Hose. Glasplys are built like tanks with a series of sealed compartments which I assume are floatation chambers in case you ever completely swamp the boat, and which may or may not be filled with foam – we are not sure.

Unfortunately the filler hose seems to go through at least two tight openings and likely 3 and we think two sealed glass chambers with the hose making a 90 degree turn going between them. Either that or its one very large unusually shaped chamber but most likely two. We are able to move the hose with considerable force and think we could pull it out. However we are not optimistic the standard tape the new hose to the old one and pull it through technique will work, even if we lube them. I certainly don’t like the idea of cutting into the glass chambers and hope it is not the only option. Anyone familiar with Glasply construction and filler hose replacement? I guess we could cut out a round hole in the glassed deck and add a plastic access port if we had to.

Turns out the vent hose from the tank is about ten inches long and then hooks up to a heavy walled copper pipe that disappears on an downward angle into one of the glass chambers below a bunch of cabinets, seat, sink etc.. Since the vent system has always worked just fine I think we may just leave it and replace the short hose and clamp. I see little value in removing cabinets etc and cutting up the boat to swap out the complete vent system unless we really have to.
 
Last edited:
http://forums.iboats.com/forum/boat...y-19-1-2-foot-stringer-repair-and-restoration

Found the attached article which show the repair of a Glasply – broken hull/stringer. It is a considerably smaller model but it does have a somewhat similar design. If you look at the picture near the end after he has put back the deck you can see where the tank is from the cover plate and the chambers around it. On our boat in addition to the chambers around the tank you can see in his pictures there are also chambers along the sides of the boat that are narrow (about 5 inches) and vertical and it is like the sides of the boat are double hulled to a little less than halfway up. So the filler hose goes down the open portion of the side of the boat enters the top of the vertical chamber, goes down and does a 90 degree turn into the next chamber beside the tank well, exits that chamber into the tank well and hooks up to the tank.

Extremely unusual to see damage to a Glasply like in the pictures occurring just from age and wear. These boats are Legendary for being expensively overbuilt with all glass stringers and of an extremely strong reinforced compartmentalized design. Not to mention being old school built of extra heavy, thick hand laid glass. Probably why so many are still on the water after 35 years and they seem to be very rot resistant. Like one of the commenters on the repair thread of the smaller Glasply, I am thinking the previous owner must have hit something with the boat and hit it hard to end up with that kind of damage.
 
Last edited:
Do you have pictures of your setup? I'm confused on filler setup to that 19ft boat's tank. Did that guy move the filler and use the hole to route the kicker fuel line?

I hate complicated runs for any lines... :) can you at least get that 90 out of fill line?

Can you run an alternative simpler vent line while you have everything apart but not connect it? Still use the old one for now but if it ever acts up you can go to plan B?
 
The tank is out and I did not take pictures but you can see the vent fitting glassed into the sealed compartment that the short vent hose from the tank hooks up to in the article I provided.

There does not seem to be any practical way to not use the current paths for the filler and vent hose as not to do so would result in the hoses ending up going through the deck or otherwise end up in a walking area where it would be in the way , unprotected and subject to damage. The current routing also appears to be the shortest and safest routes. However, the trade off is difficult access.

Here is another Glasply article on repairing an AL fuel tank.

http://www.thehulltruth.com/boating-forum/735452-1975-glasply-hard-top-fuel-tank.html


The reasons I am replacing the tank rather than repairing are:

The tank is ancient at three decades plus and does not owe us anything.

Has already been repaired twice, once by a previous owner by welding and once by us on an easy access pinhole leak on the top using “Seal-All” for sealing metal gas tanks- often considered an emergency repair, rather than a permanent repair.

I don’t want to have to ask my fishing buddies who are volunteering with this rather major project to do it all over again if a new leak appears a few months down the road just because I was trying to save a fair bit of money and hoping for the best.

Most important of all – we go fishing for fun and to relax, preferably on a warm summer day. It is hard to relax when you are wondering if you and others just may be standing on top of a very large unstable bomb waiting to become a hundred foot high fireball. I don’t mind dying on the boat, but am thinking more along the lines of a major heart attack just after landing a 60lb Chinook.
 
I also did some preliminary local price checking and standard A2 1.5 filler hose is about $10.00 a foot and corrugated is about $15.00. a foot and a bit less if you have an account with a discount, so 79Jimmys offer is worth looking into if you can use can use it. Not sure if it would work for me as I may need the more flexible corrugated type to try and avoid having to cut into the boat chambers.

We are thinking about attaching a smaller diameter hose we have to the existing hose and pull it through and then sacrifice a couple inches of the new 1.5 hose and cut it down and shape the end so that we can turn the end into a duct taped cone attached to the smaller hose which may make it easier to pull as it would hopefully self guide through the tight openings and bends without getting hung up. Could also attach the two hoses together under the cone with some wire or tuna cord for connection strength and them lube with silicon grease. Have to do this without increasing the diameter with tape at the connection given how tight the openings are.

Any boat work is always more expensive than you think it is going to be. Have not priced them in a few years but I would guess the higher end hose clamps may be about $13.00 each now for the filler hose size. Trotac caries the high end clamps of different designs and quality from expensive to very expensive.

I do like the ultra high end Trident 329 series 1.5 filler hose that is on sale for $131. US plus shipping etc. I suspect it would be well over $200. Canadian by the time you get it. Comes in a 12.5 foot length of which I only need about five feet.
 
Last edited:
I have some 2 component rubber adhesive that I needed a bunch of waivers to get into the country. It works rather well for sticking rubber to itself and stainless. If you want some to glue a sleeve inside the two 1.5" fuel lines let me know.
 
Thanks Gunner. That is a very generous offer. Can you send me a private message with your phone number. Gluing in a connector should not increase the diameter at the connection point which would help with pulling the new hose through the tight openings. On the down side it would increase structural rigidity at the connection point possibly defeating the advantage of going with the increased flexibility of the corrugated A2. This could possibly cause binding with what we think is a likely 90 degree turn right at an anticipated hidden opening pass through. The question is which connection method would be more likely to succeed, the cone end method to a smaller diameter hose (hopefully somewhat self guiding), or the one to one connector method as you can only pull the old hose out once. If the glue is strong and the internal connector short I am thinking what you are suggesting may be the best method and less complicated. Perhaps a little thin wire through the low points in the corrugation would add some connection strength without increasing diameter.

Have sold off a lot of my specialized tools because of age and health issues and not wanting to be tempted to try and do work I should not anymore. However I wish I had kept the colour video inspection system. It would have a lot of applications in checking out boats like a GlasPly which do not have foam in the compartments. Slipping in the small flex shaft camera probe beside the existing hose from each end to do a complete route survey and internal condition check of the compartments would have been easy.
If I was a young guy with a lifetime of boating and repairs ahead of me I would get one as the cost is getting very reasonable with all the advances in micro cameras and led lights. Useful to be able to look around in closed spaces even if you have to make a small drill hole rather than having to start with cutting into sections of deck, wood, glass and aluminum.

Have learned that not all A2 1.5 inch corrugated hose has an outside diameter of 2.0 inches. Some are just a little less like this one and every little bit could help in a tight pull through situations.

http://www.go2marine.com/product/25...ire-acol-corrugated-fuel-fill-hose-1-1-2.html

Time to stop over-analyzing, buy some hose, pull it through and if we get stuck, its on to plan B. Not hard to tell I have lots of time on my hands and a little boredom waiting for the tank construction to be completed.
 
As predicted, getting the new corrugated Trident Filler Hose installed was a be-ich. What finally worked was using a 2 inch long rubber joiner hose inside and sewing the old and new filler hoses together using a huge sewing needle (Michaels has them) and very small diameter 100 lb test Halibut fishing line (Tuf Line XP) and Dacron backing, after drilling the hoses many times with a small drill bit. We connected sewing both through the joiner hose and by sewing and connecting from filler hose to filler hose. The first time failed as we got hung up at the hidden 90 degree turn. Pulled it back out - lucky, removed all the stitching and did it all over again from the other direction. One extremely tight pull through. Put a layer of duct tape on the outside the first time and none when we finally got the new hose through from the other direction, lubed up with liquid soap.


The tank is completed and ready for pick up. Just passed the 24 hour pressure test. By the way the builder used the liquid method to seal the fittings, not the fuel rated plumbers tape.
 
Last edited:
Back
Top